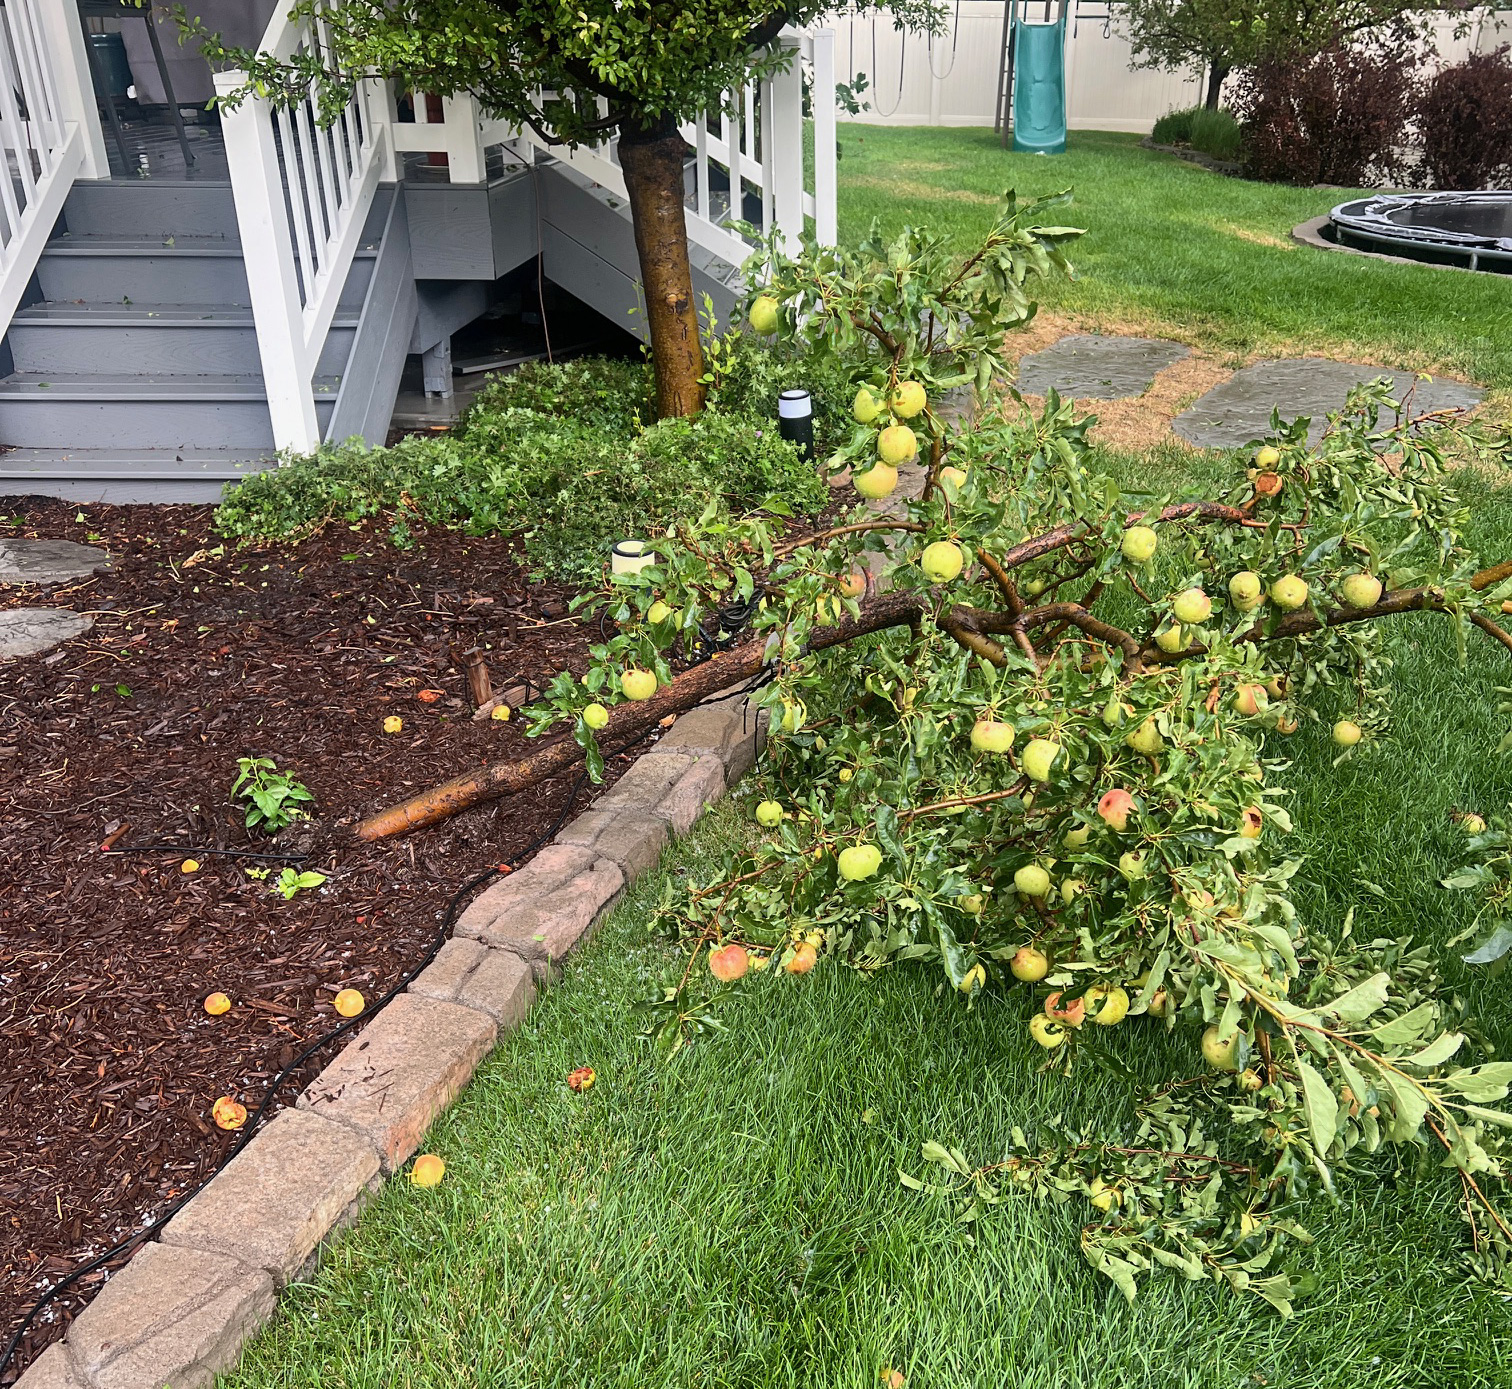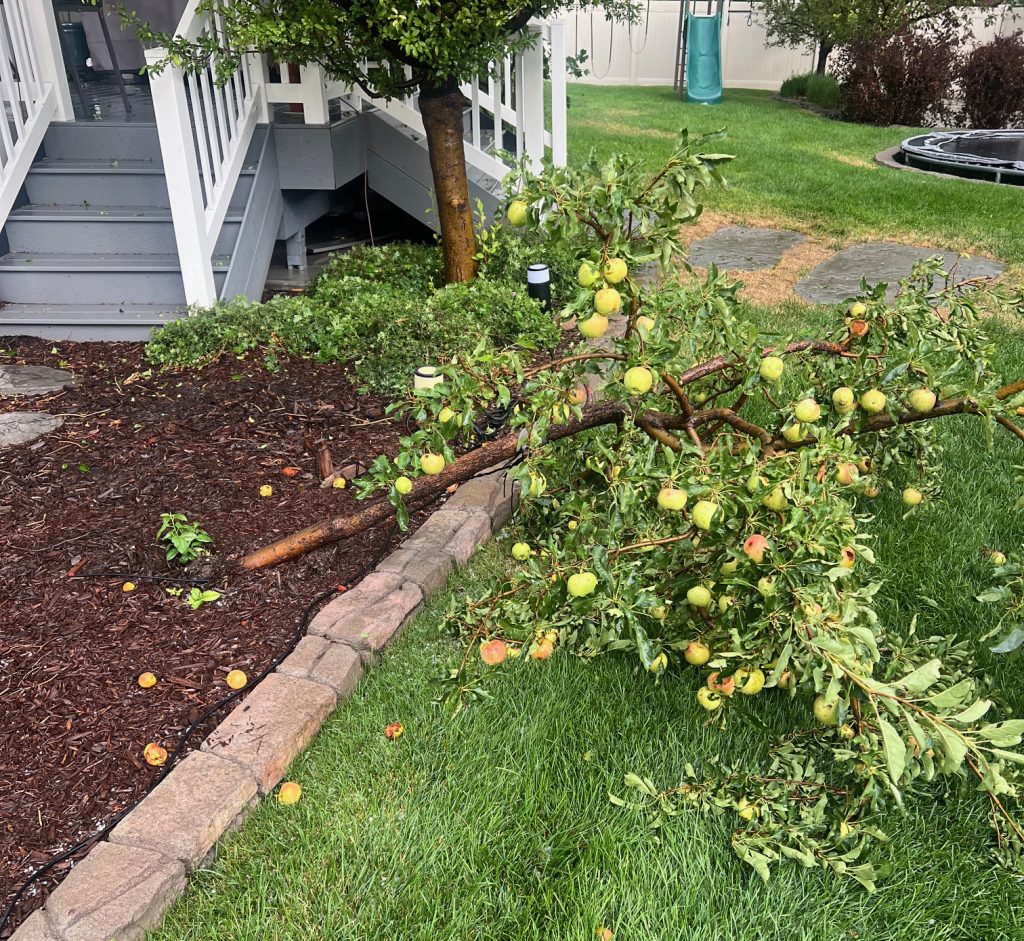
We have a little apple tree in our backyard. Around this time of year (August) it is covered in Apples! We recently had a strong storm and the apple tree fell over. My son and I tried to get the tree back up but, even with stakes, it just kept falling over.
Eventually I realized that the tree was just too heavy. I told my son that we needed to remove the apples. After we did that the little tree was almost able to stand on it’s own! We got it secured back into place and I’m glad to report that it’s doing fine.
Are we sometimes like this tree? We carry so much weight, such a heavy burden, that when the storms come we fall and cannot get back up? What are we to do? We need the extra weight removed and sometimes we cannot do this on our own.
Oftentimes it is Christ who can unburden us. When life bring us to our knees we call out and he helps us back up. Sometimes there is a proxy, like my son and I . We should be on the lookout for those who have, for a moment, been burdened beyond their ability, and see if we can find a way to help. “Bear one another’s burdens, and so fulfill the law of Christ” (Galatians 6:2)
This story seems to have infinite insights- at least it has for me. The fruit of this tree was good. We can be so preoccupied with producing good fruit that it overwhelms us. The expression “too much of a good thing” is applicable to us, just like it is to the tree.
We were not meant to carry more than we can bare. When we fall there is a way back. Sometimes we cannot do it without the help of Christ or of those who are acting on behalf of Christ.
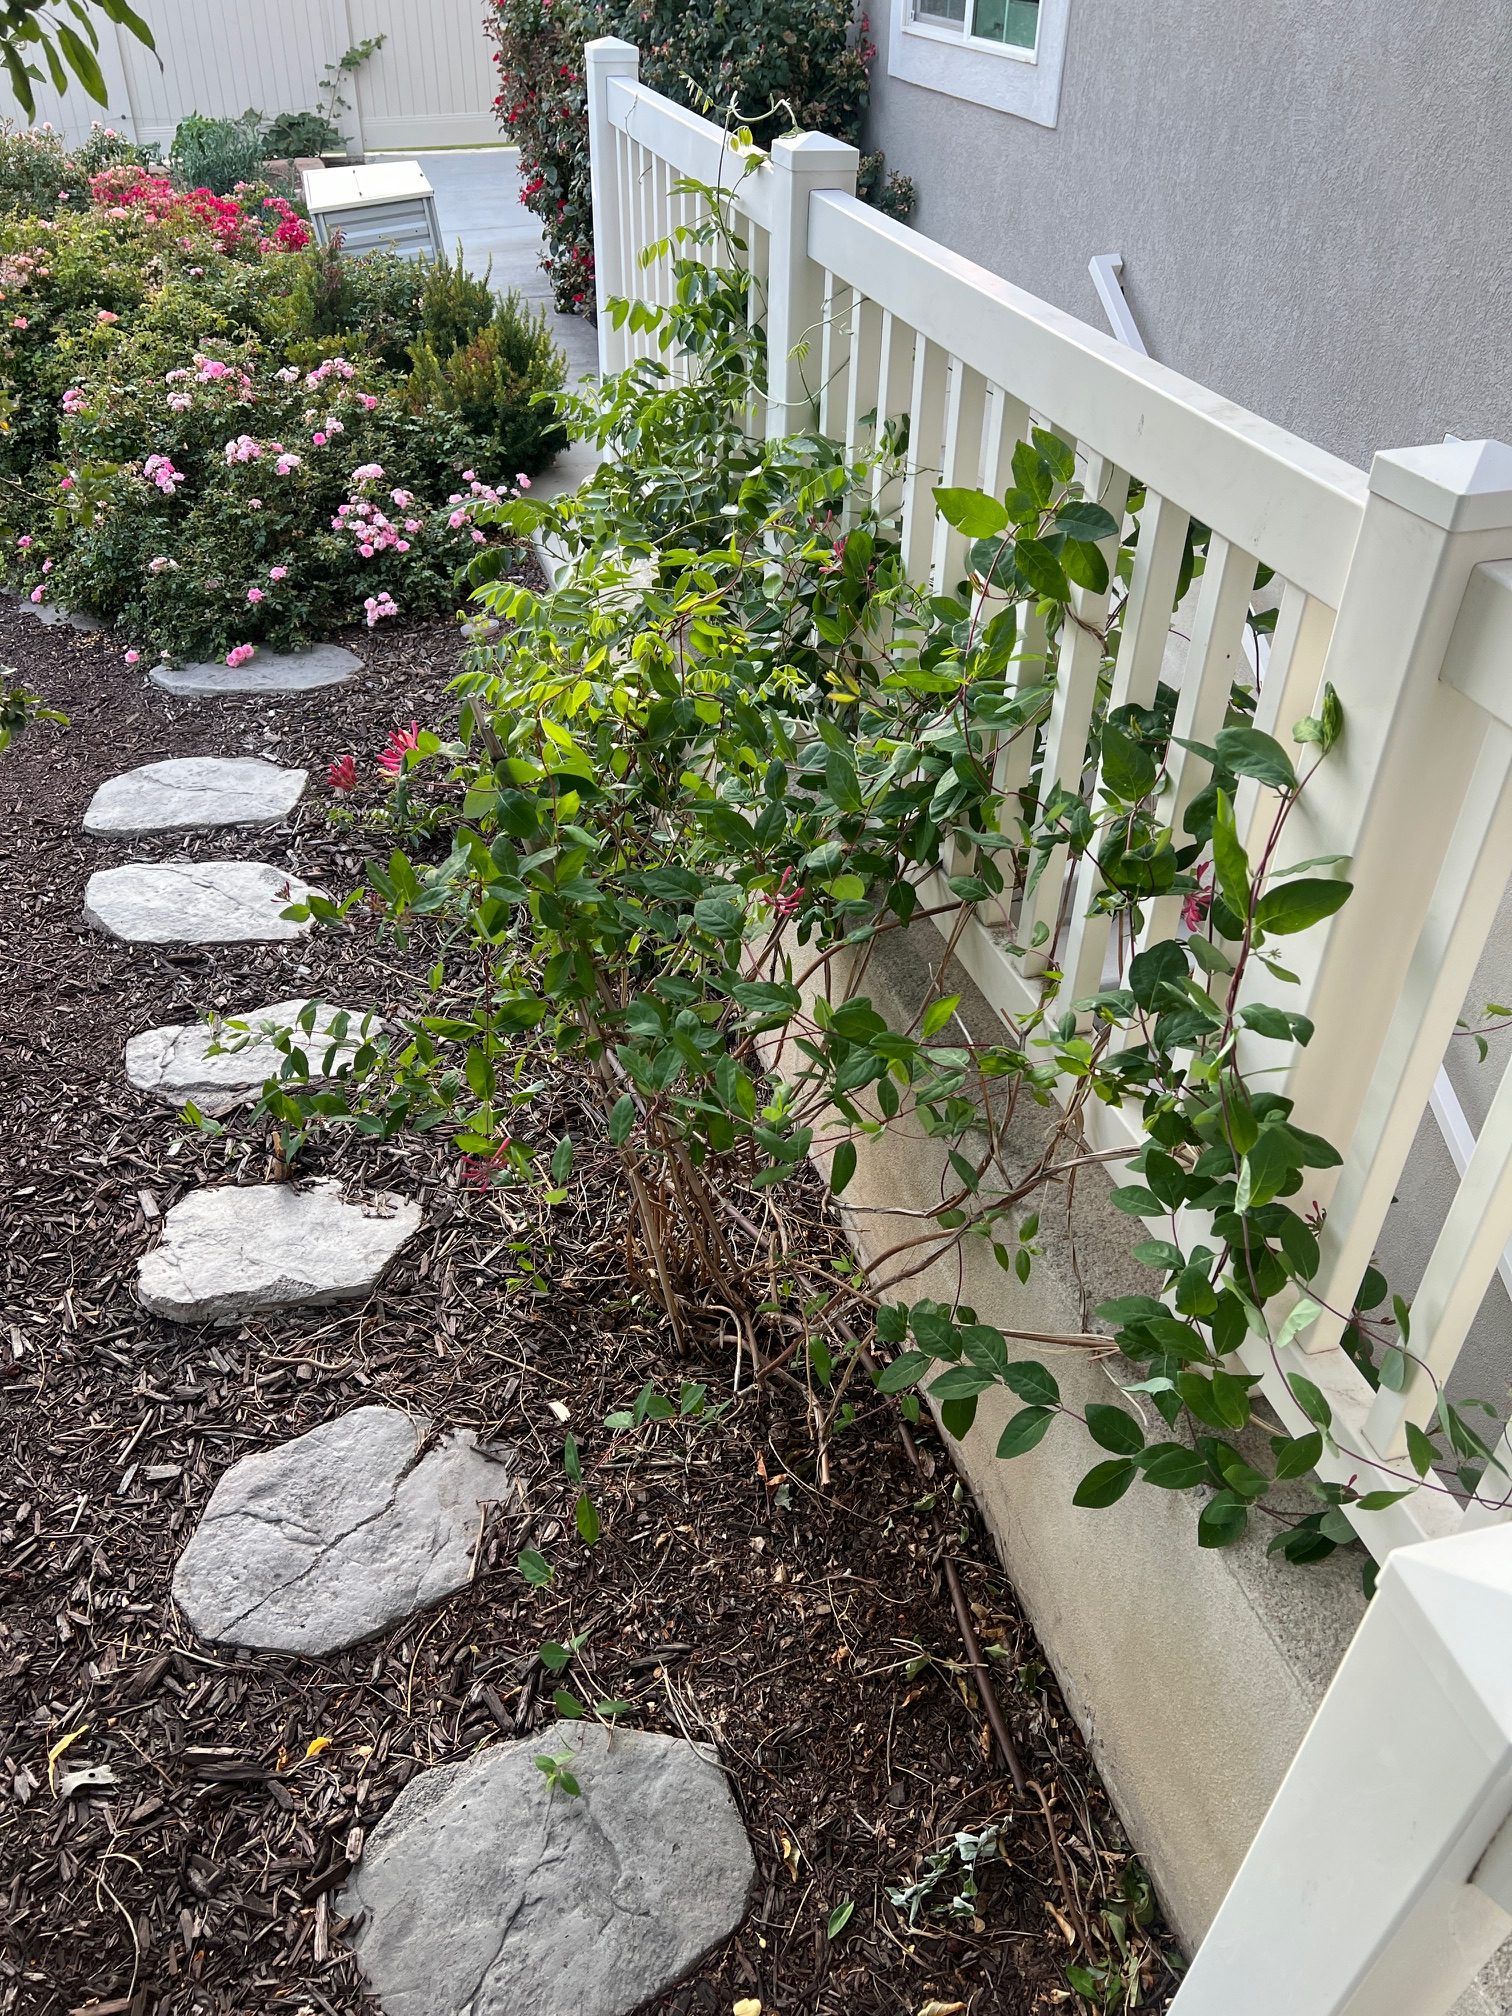
The Honeysuckle
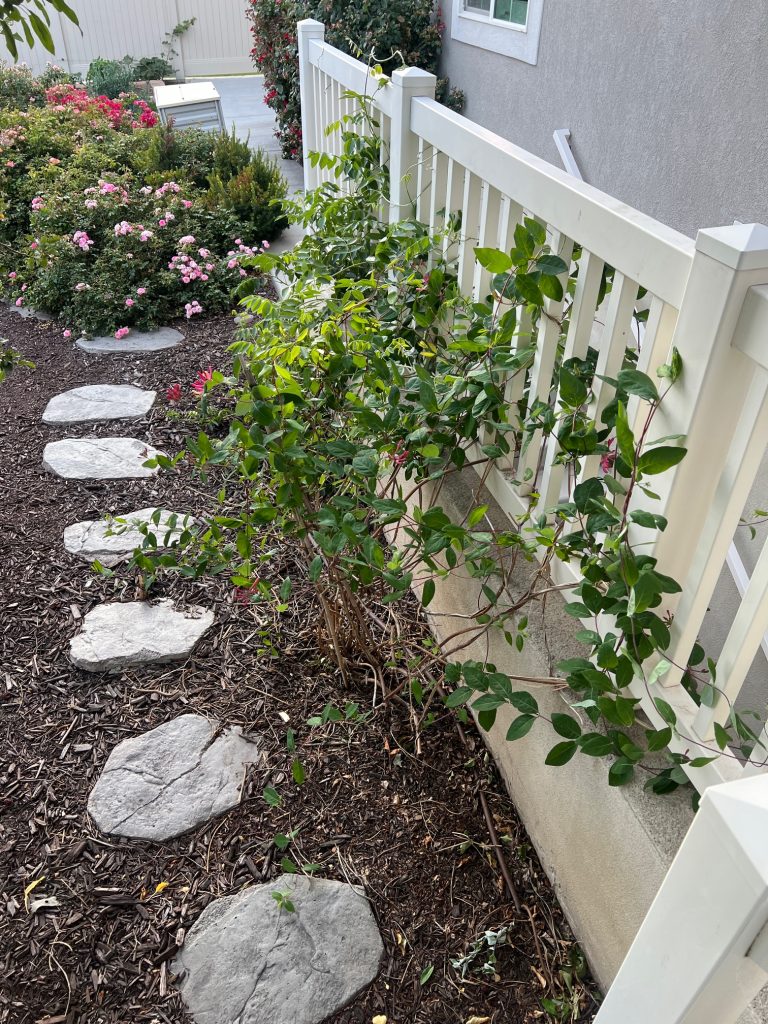
The honeysuckle plant by our basement stairs was overgrown, inflected with disease and was being choked by a neighboring trumpet vine. In short, the honeysuckle was in trouble.
My wife decided there wasn’t really a way to separate the vines, or to salvage the current growth. She cut the plant down to it’s roots. It’s important to remember that the root system was still strong, having grown over many years. Slowly but surely the honeysuckle began to grow again. My wife placed the new growth on and around the railings and it has blossomed.
Are we like the honeysuckle sometimes? Our life is so crowded that we are just aimlessly growing, consuming, crippled by our overabundant lifestyle (or that of our rambunctious friends, the trumpet vines)? Maybe we occasionally need to be cut back to our roots so that we can regrow healthier and stronger and free from clutter and maladies. Maybe “loss” isn’t really loss if we grow from it.
Like the honeysuckle our root system is constantly growing. It’s probably stronger and more developed than we think it is. The master gardener knows us, sees our struggles and can help prune us if we ask (and sometimes even when we don’t ask).