
These MACarbon seat belt buckles have been a bit of a headache for me. I had to modify the covers for the two rear buckles before they would fit. A recurring warning light forced me to replace the front passenger side buckle altogether. And then the new buckle promptly “broke” apart (the two parts of the housing separated and it’s much worse where the belt is attached and there’s tension). I’m not sure if I’d buy / install these parts again.
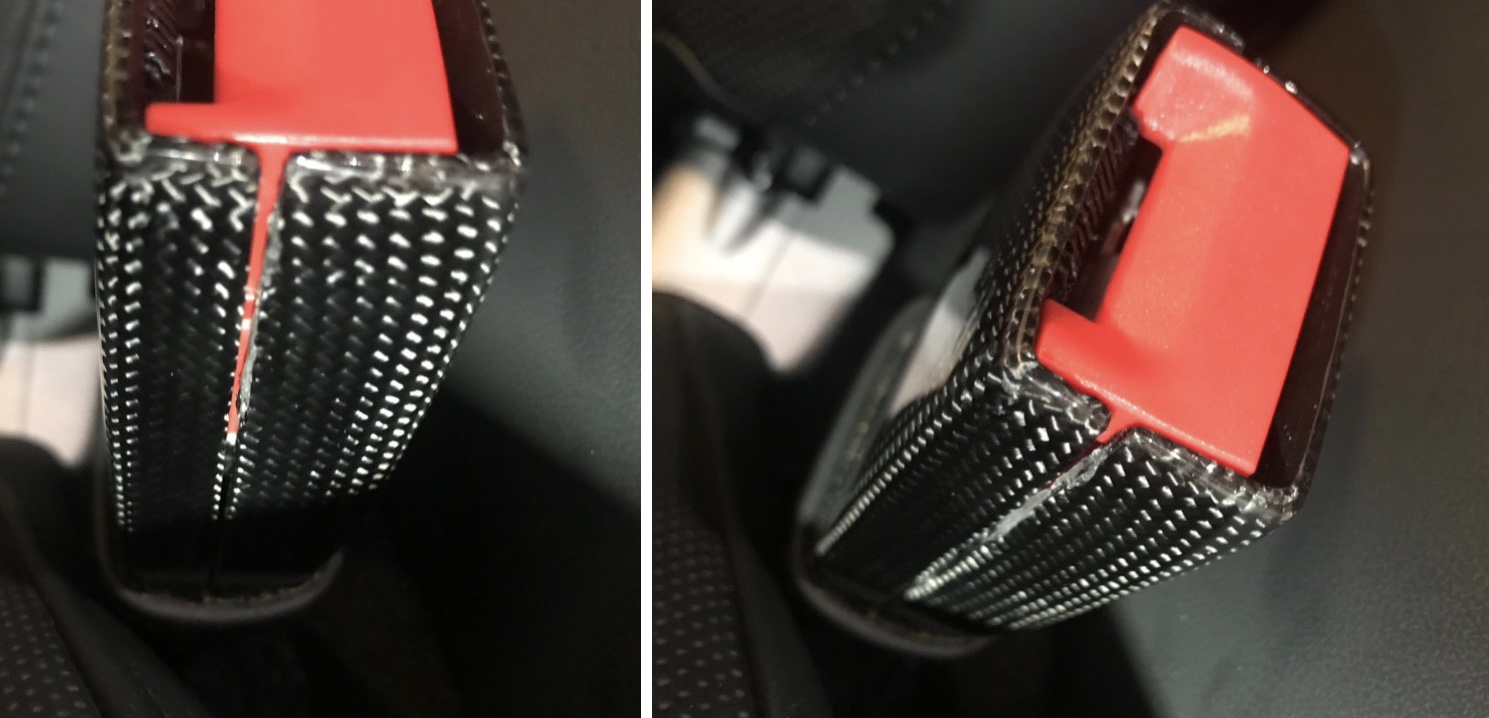
Regardless, I’m a guy that looks for solutions. The first thing I tried was epoxy. I glued the halves back together but they came apart again shortly after transporting a passenger. I considered a number of different options before settling on some 3M adhesive- the same stuff you might cover the exterior of your car with. I cut out a couple of sections and did some test fitting.
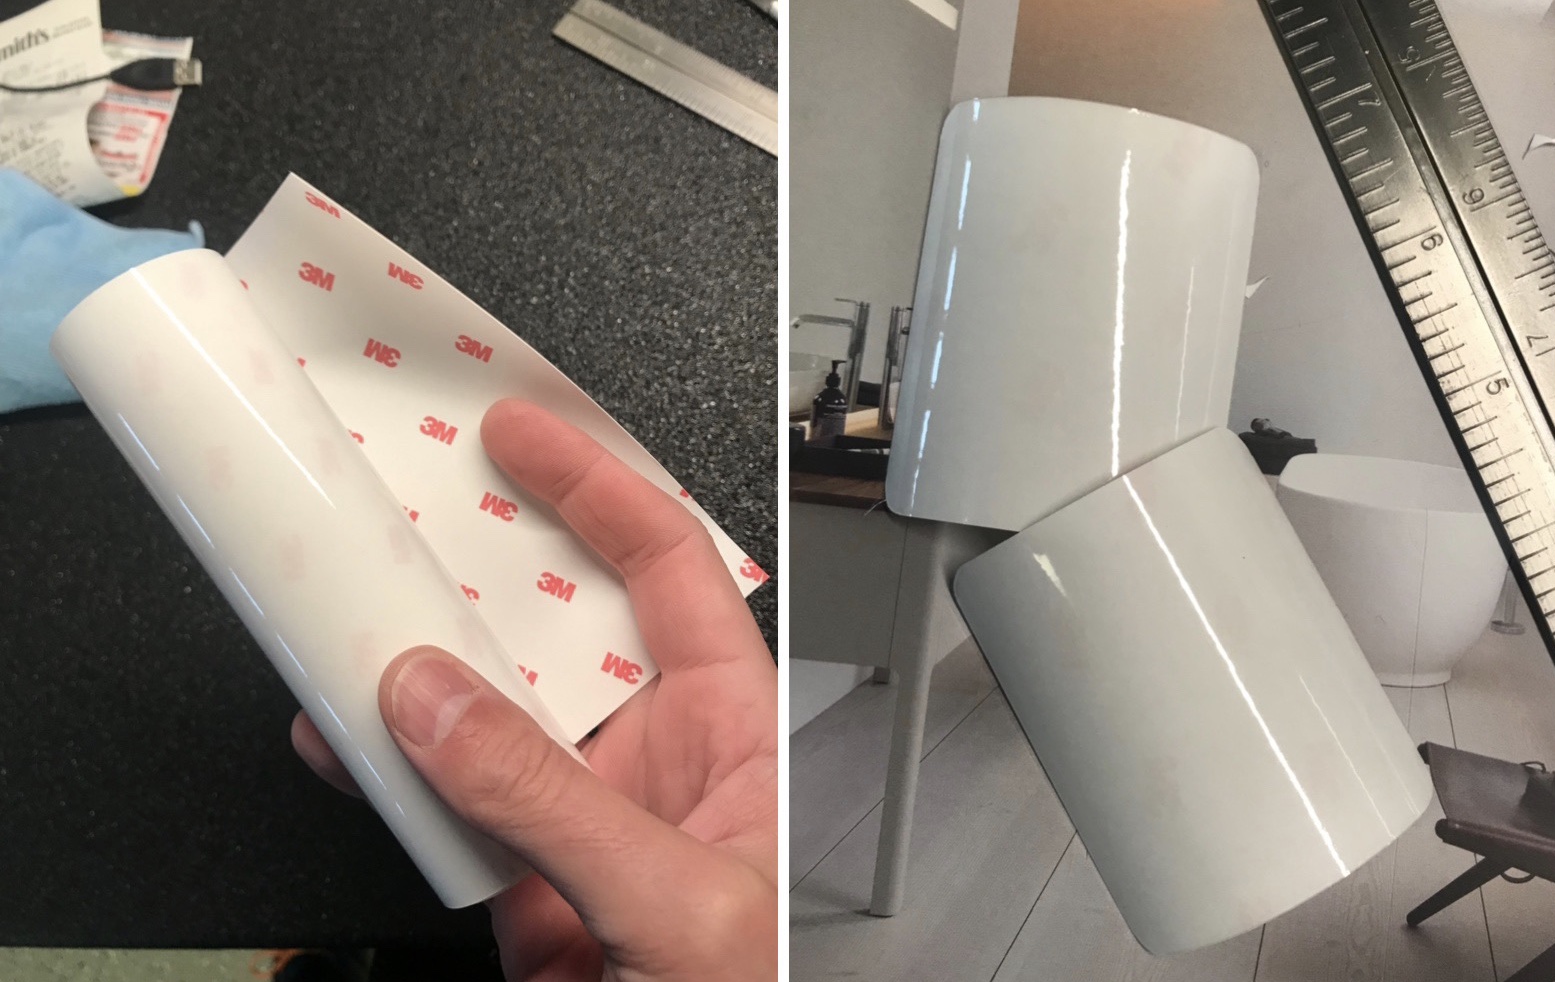
Originally I had just intended the fitting to be temporary but the 3M seemed to be exceptionally strong and the installation went fairly well (you can see the lines in the pictures but in real life it’s very hard to see where the film is at all).
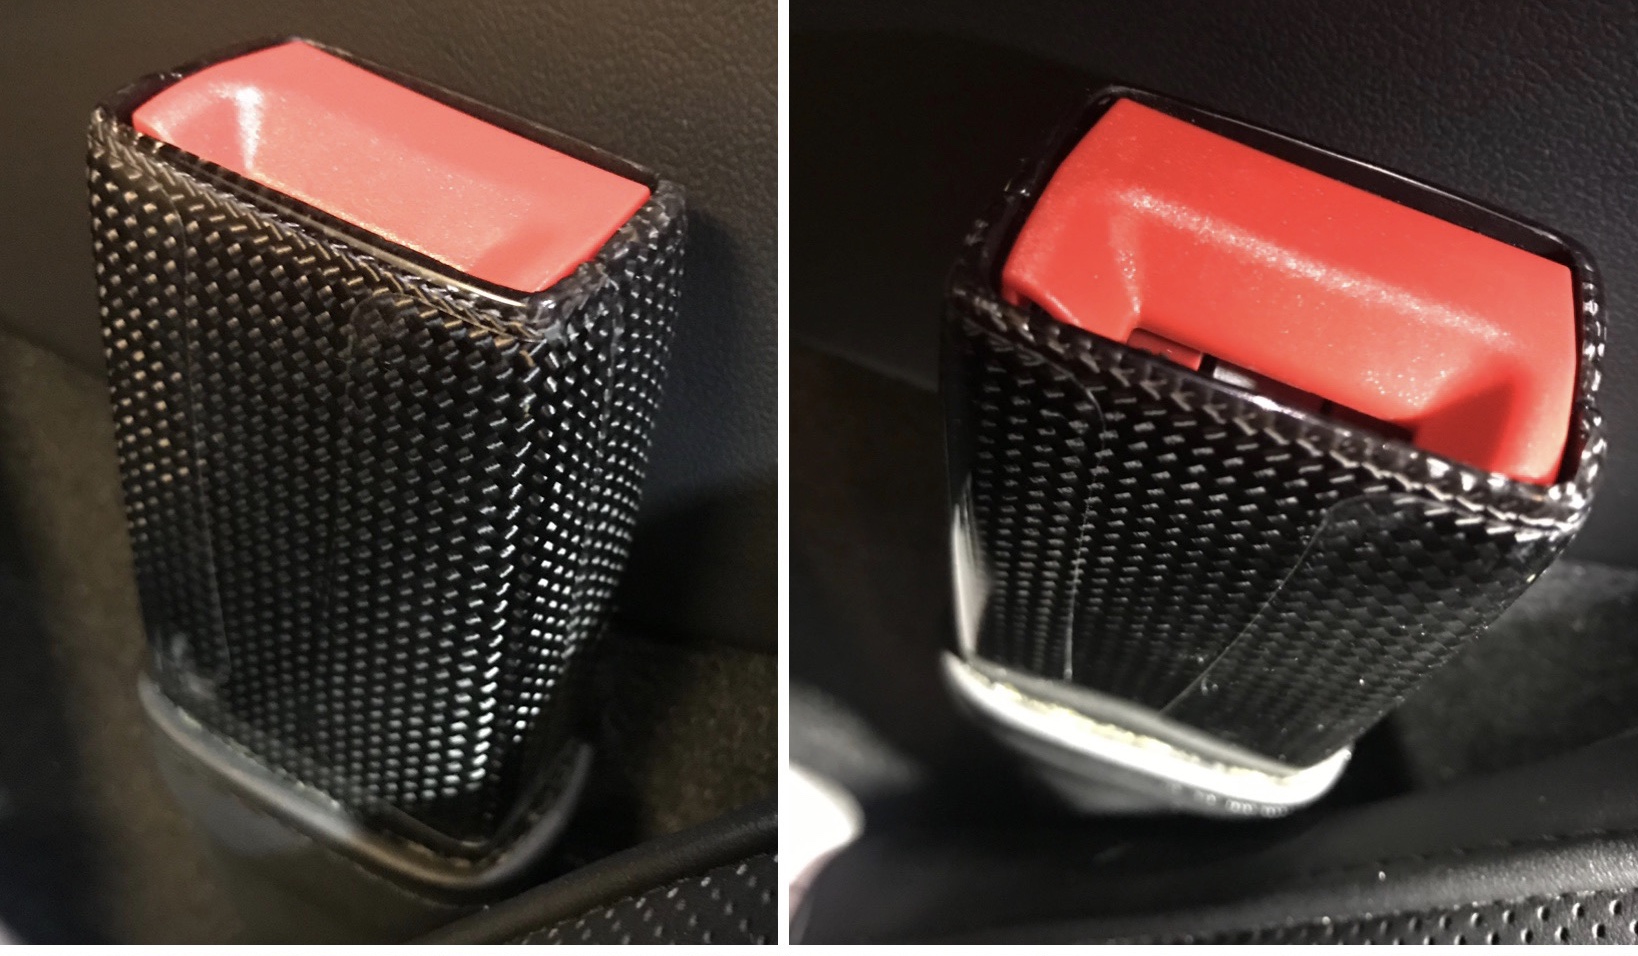
One of the back seat belt buckles also had a case that was coming apart so I applied the 3M there as well. I suppose my next step will be to see how well the film works over the coming months (I’m worried about its ability to stick and the potential of stretching). In the meantime this appears to be a quick and elegant solution for anyone with a similar problem (and not just limited to seatbelts folks– you can wrap this clear 3M film around pretty much anything).
Tag Archives: DIY
Something Goes Bump in the Night (and Day). Porsche Repair
It’s been awhile since I made this adjustment, but I wanted to a second and memorialize just what I’d done. It’s probably been a year since I first noticed the bumping noise coming from behind me. It was a rapid and systematically occurring thumping sound aggravated by uneven roads. I accused the seats, seatbelts, various tools stored in the back of the car and even my imagination before I finally found the real culprit. I wedged myself into the back seat and tapped on everything until I finally discovered a piece of interior trim knocking against the car’s frame.
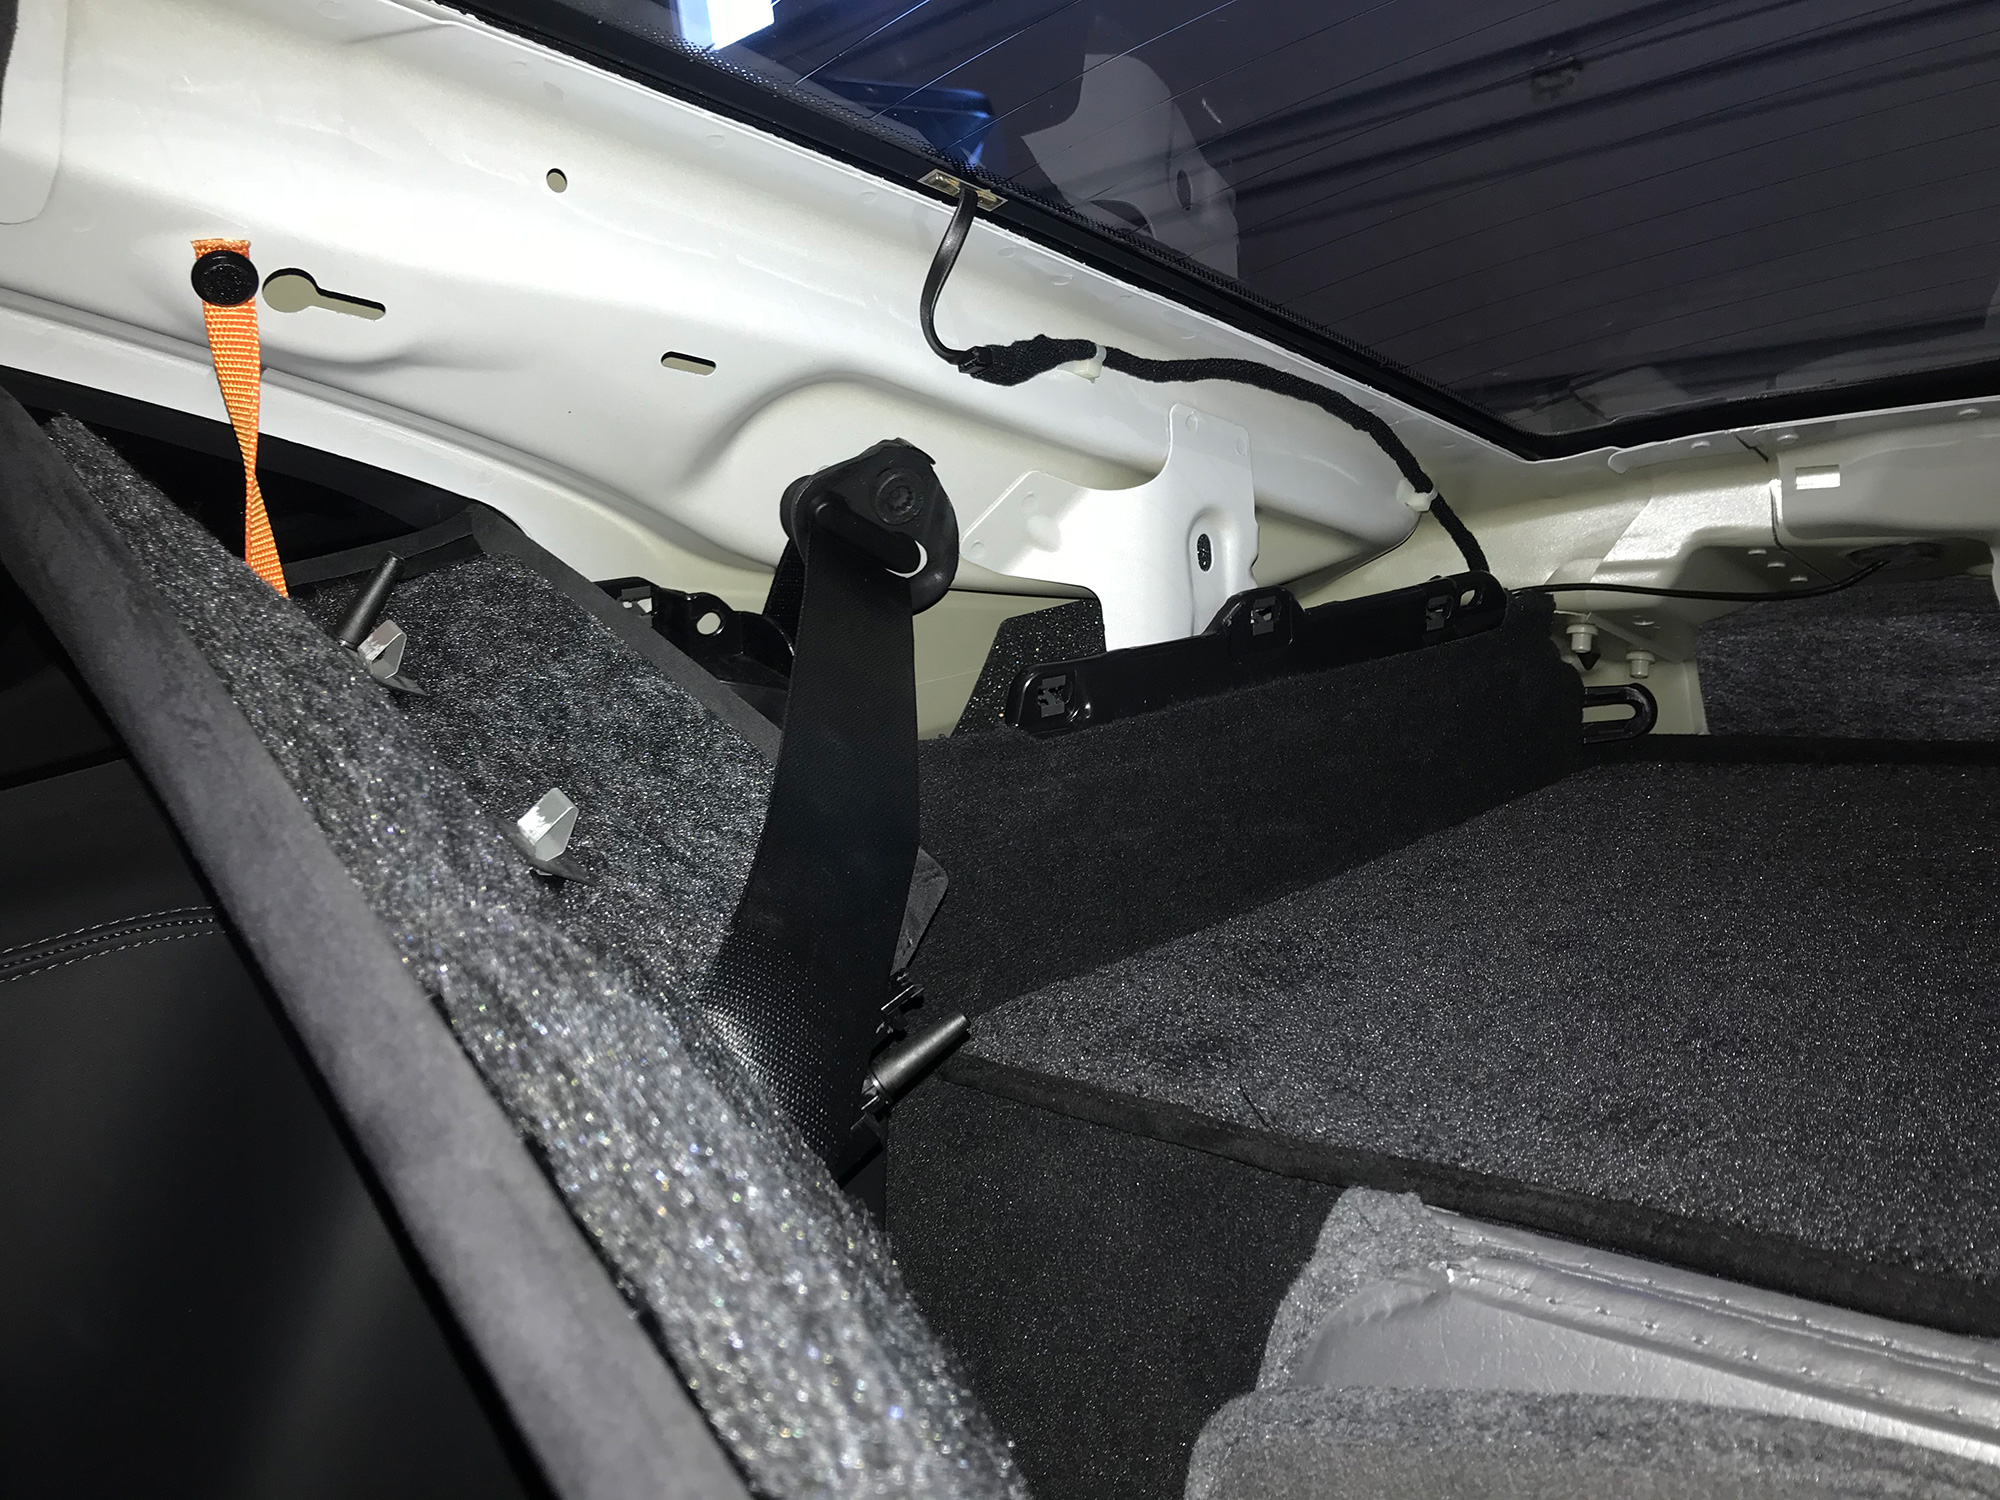
For context: You’re looking at the A-pillar that holds the rear right seat belt (the belt is still attached to the frame). The back window of the car is visible in the top-right.
Removing the interior trim along the right A-pillar was unpleasant. Even after I found the parts that were hitting each other I wasn’t able to determine what parts of the parts were making contact. I tried various sound deadening fixes like felt, molding tape and strong language. Eventually I hit the sweet spot and the noise was radically reduced. Zipping things back up was even more work than taking them apart but I got it done (and it was done right). One less noise in the cabin – easily the largest offender – has been eradicated! This makes me want to revisit my efforts to cap off the engine noise being pumped into the car. One day.
Porsche 991 Washer Nozzle Replacement
Legend has it that in order to replace the 991 headlight washer nozzles the entire front bumper of the car needs to be removed. Not so! With just a few simple tools anyone can swap their washer nozzles in about 10 minutes. You can pull them out and repaint them yourself or pop in a ready to go set. Below is a quick video showing you how:
I ordered a carbon fiber set from eBay but the weave wasn’t quite right and the quality didn’t impress me. I bought a second pair from BumperPlugs.com and had them painted metallic white (that must be an impossible color to match). This is the set that I ultimately put in but I’m not sure if it’s the look I’m going for. You know you’re pretty desperate to do projects when you’re replacing your headlight washers. #modlife
Porsche 991 MACarbon Fuel Door
What’s better than a stock part? A carbon fiber part! MACarbon makes an awesome all carbon fiber fuel door replacement for the 991 series. I tried to hold out but there was never any hope:
Installation was a little tricky as my part required a slight modification (as have some of my other MACarbon items) but I don’t mind that stuff at all. The fuel door looks fantastic, and, in my opinion, it’s a part I would recommend to anyone who wants to shave a few ounces off their car (okay, it is lighter but that’s obviously not why you’d get this part).
Raptor Recon Illuminated Modifications
A few months ago I picked up a few illuminated Recon modifications for my truck. I’m a sucker for pretty lights so I thought these would be perfect. The illuminated door sills were a no-go from the moment I opened the box. Peeling / cracked stickers, missing hardware and a questionable installation procedure had me scratching my head:
The next illuminated parts were SVT vents on the side of my truck. The quality was much better and the install went smoothly, for the most part (the body clips provided by Recon didn’t fit correctly):
You win some and you lose some! I’m still looking for better door sill replacements (maybe non-illuminated). If you come across some shoot me a link.
Porsche 991 TechArt Carbon Fiber Diffuser
And now for a sad story with a happy ending. In March (has it been that long?) I purchased a Techart carbon fiber diffuser. The diffuser arrived quickly but:
I had bought the diffuser from an online vendor (who shall not be named as the experience wasn’t great, but it wasn’t all their fault) but I wasn’t able to make any headway getting the problem solved. Happily a representative from TechArt actually saw my first video and invited me to reach out to him. I did and TechArt offered to produce the correct part for my car:
In the end what’s an extra month or two? This kind of stuff isn’t a big deal and I am very impressed by the way TechArt stepped up. In fact it makes me feel extra good now to have TechArt products adorn my car. Even though this isn’t a high contrast addition (it sort of disappears into the valence) I still think it looks excellent.
Darwin Pro Carbon Fiber Headlight Rings – Porsche 991
As many of you know I am a carbon fiber addict (and apologize for saying this over and over and over… but the first step to overcoming an addiction is admitting you have one). I have been looking for ways to add a little more carbon fiber to the front of the car. The headlight rings have been on my radar for awhile but I resisted the urge because- and this may sound crazy- I don’t like to add carbon fiber just for the sake of adding carbon fiber. It’s nice when there’s some kind of functional benefit. But who am I kidding… I loved the set I had on my 997 so I knew I would like these too.
This was a fairly inexpensive set and I’m pleased with it, for what it is. The fitment is good (one side was slightly warped but I was able to get that sorted out alright) the quality acceptable and they look great. I had to use my own adhesive which was fine (all of this is covered in the installation video).
The one thing I’d nitpick is that the weaves weren’t complimentary. Typically, as I explain in my video, I’d expect to see the weaves running in opposite directions where there is a distinct left and right piece. Having them run in the same direction isn’t really much of an issue and my guess is that most people wouldn’t even notice this discrepancy. I thought it would bother me but having had them on for a week it’s not an issue.
Overall I think they are a nice addition. It’s a good way to get some carbon fiber on the forward facing end of the car. It’s a non-permanent addition too – if I find a nicer set down the road I should be able to swap them out with no issues. The parts were ordered from eBay seller dpro6097 (the eBay division of Darwin Pro). Customer service was responsive when I asked them about the issue I was having with a warped part.
MACarbon Steering Wheel Installation – Porsche 991
I have lusted after the MACarbon custom steering wheels for long time. Last year I decided that I was ready. No matter the cost, no matter the wait… I was all in. I submitted the order for my wheel in October and hoped it would come in time for Christmas (my ignorance knew no bounds). I worked with John, who was fantastic. He suggested the white stitching on the leather portion of the wheel and I love how everything turned out.
Below is a video showing an overview of my steering wheel and demonstrating the wheel removal process on a Porsche 991:
The wheel was completely worth the wait! I’ve purposefully tried to balance the interior and not get too carbon fiber crazy (real crazy). I’ve kept a good mix of Aluminum present (i.e. door pulls, pedals, shift knob) and so I left the center of the wheel silver. But the carbon fiber dash accents flow perfectly with the top and bottom of the wheel, which are also carbon fiber. All in all I feel like it’s incredibly complimentary and perfectly inline with the vision I have for the car. The only drawback so far is that the carbon fiber parts of the steering wheel do get a little colder than the leather (not great on wintry days)… Still one of my all time favorite upgrades!

I really enjoy the process of customizing my car. I feel like each modification makes my car into something more one of a kind and that uniqueness beings a lot of satisfaction. I’m glad I did’t shy away from carbon fiber this time around. Also, I can’t say enough nice things about having a cool dealer right up the street- infinitely convenient.