Autometer ES Gauges (How to Install C6 Corvette Gauges)

Once you start down the road of car customization there is no end. There’s always one more accessory, another change, and a quick tweak that turns into a major project. “I’m going to replace my gauge pod… and my gauges… and I guess my whole A-pillar trim and hell, I may as well pull the steeling column panels out and rewire everything since it wasn’t quite right before.” So that’s what I did.

I decided I was sick of the incandescent edge lit Autometer Z-series gauges in my car (and even more sick of the fact that they are wired in such a way that they are always lit).  I really liked the look of the red LED backlit Autometer ES series gauges and so I picked up the fuel pressure and boost models. I think the lettering font on the ES gauges looks much better too and I like the fact that the letters are white when they aren’t lit. The ES gauges also go really well with my Innovate AF gauge.
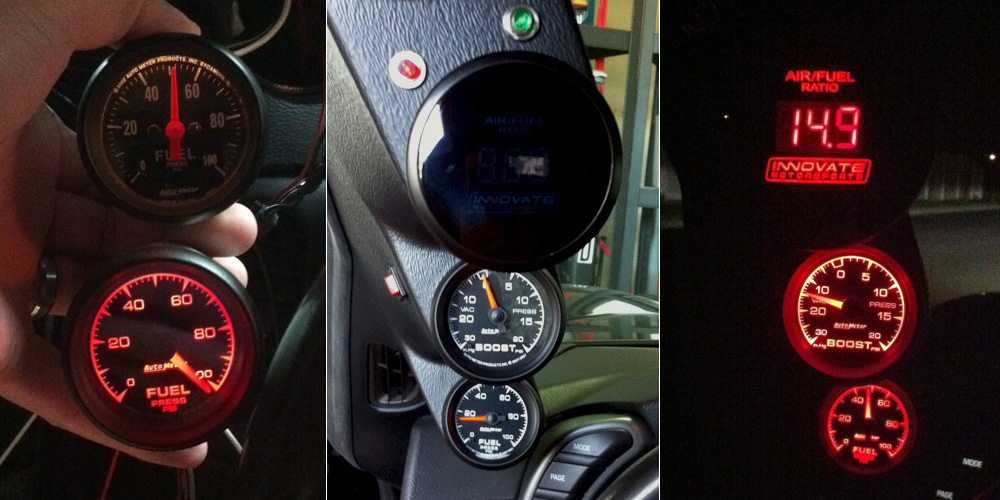
A Few Installation Notes

My gauge pod was in bad shape from being pulled off several times (warping,  misaligned panel fasteners, extra holes) so I decided to get a new one.  I recommend Speedhut for gauge pods for the C6 Corvettes (both 2 and 3 gauge). They pods are inexpensive, good quality and Speedhut offered fast free shipping. No issues. The extra lights and switch on my pod are for the methanol kit, btw.

If you’re putting in your gauges from scratch then there’s a great document from A&A Corvette Performance: C6 boost and fuel gauge installation  on the A-pillar (as a side note: I got my last clutch from A&A Corvette and they were great). I didn’t have to run the wiring for the fuel pressure or boost gauges this time (I used the old wiring harness & tubing), but I did end up taking off the paneling below the steering wheel to tweak the wiring and I have a few things to add to the A&A instructions.

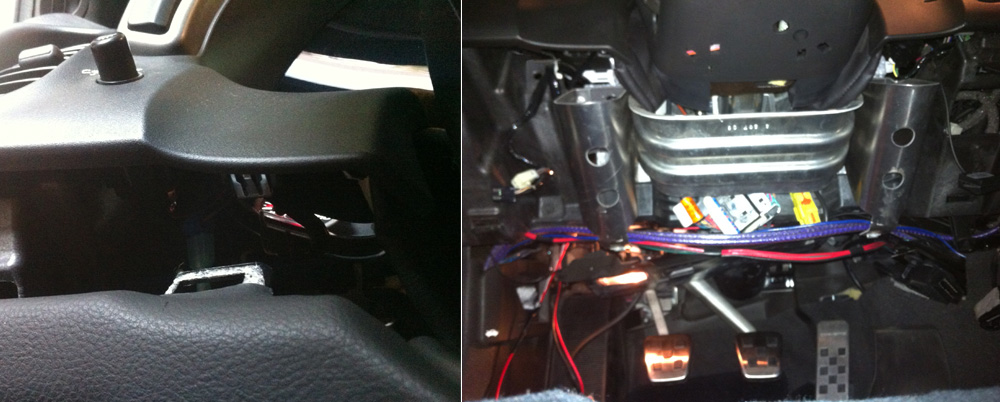
When you pull off the paneling it’s important to note that the bottom panel (below the steeling wheel) actually has a bracket that the dash panel clips into. You need to pull the dash panel out a bit to remove the lower one (left picture). Then just for reference this is what you should see minus the red & purple wires on mine (right picture).
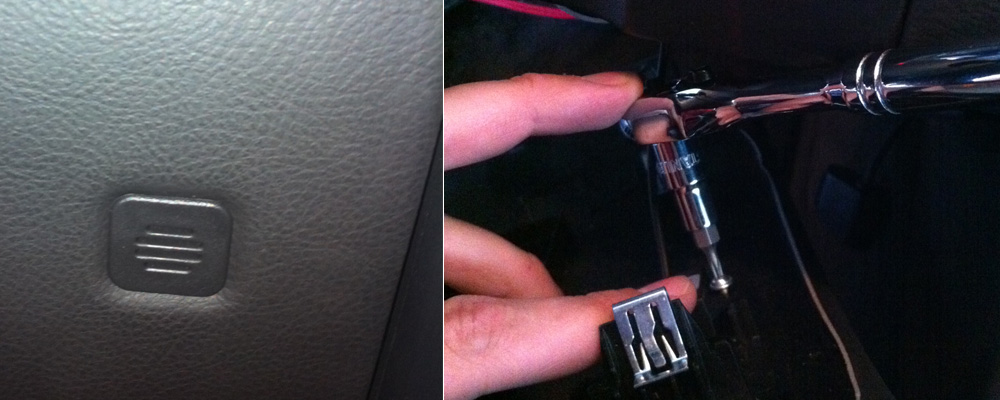
I don’t see a need to remove the ignition button as mentioned in the A&A doc. But you will need to remove the small microphone (left picture).  There’s no harness for this part and the best way I could think to remove it was to use a Torx 10, a socket wrench and and hex head adapter. This will give you the angle you need to unscrews the microphone (you could just prop the panel up on something and not actually take it off but it is more convenient if you remove it).
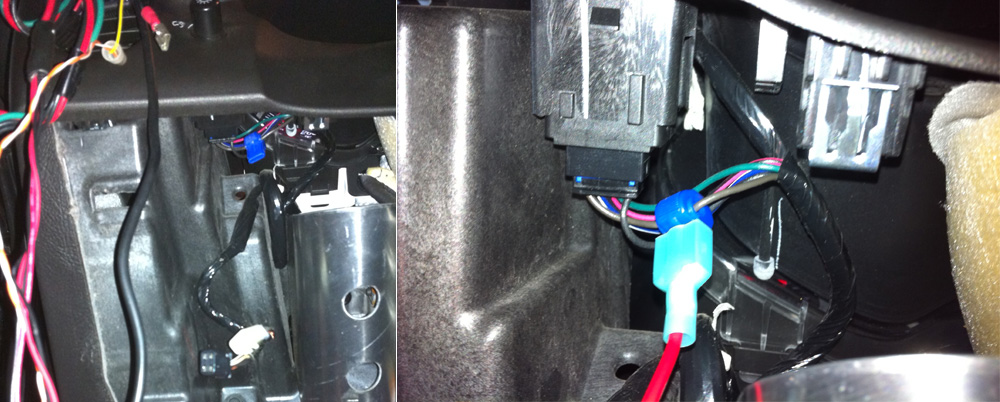
The dimmer harness is easily accessible from under the dash (it’s right behind the dimmer switch). I don’t think it’s even necessary to pull the harness out. I spliced into the wire and used a T crimp clamp to run power to my gauges (just the power for the backlighting). It is really nice to have the lightning in the gauges functioning with the headlights in the car (I also wired in my wideband gauge to that it dims at night).
Like I said, I didn’t do any of the hard stuff this time around, but I wanted to add a couple of suggestions and pictures from the work that I did do. So there you have it- my pod and gauge swap. And it’s just like the saying goes, “Gauges make the man.” Or something like that.


Posted by Cam Hughes, October 17, 2011
Sticker & Emblem Insanity Post Update

Rocky Mountain Disgraceway

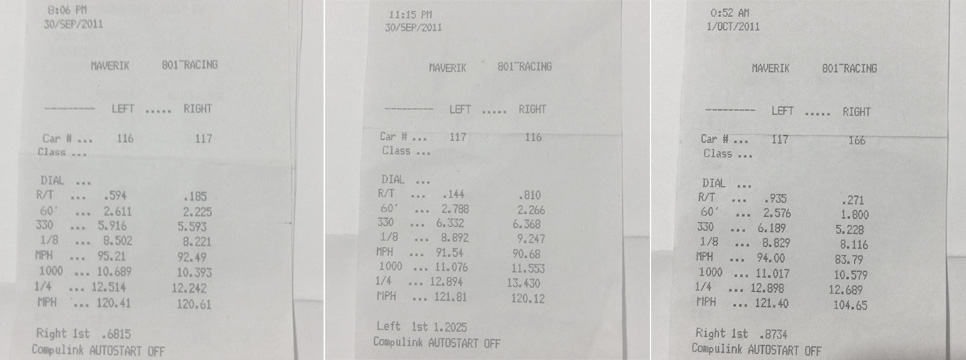
I’m sad to report that the stars did not align. My car was ready, but I wasn’t. As I envisioned my quarter mile time I forgot one critical element: I don’t know how to drive. The realization hurts the ego a bit, but this epiphany is a critical first step toward achieving my goal. I was able to do three runs (I’m car 117):

Anyone who bothers to look at these slips will find a common theme. My 60′ time is pretty bad. Poor launching technique resulted in loss of traction and bogging. I really should have practiced more but I was under the mistaken impression my tires would stick to the track like glue no matter how badly I launched. Operating under this false notion caused severe wheel spin anywhere north of 3000 RPMs. Overcompensation resulted in the car bogging as the RPMs dropped too low. Any 60′ time of 2.00 or less would have landed me in the 11’s.

I was a little surprised to discover that my trap speed was consistently around 121 mph, compared to 131 mph two years ago. Of course two years ago one of my boost reference hoses had fallen off and the car was boosting to 11 pounds in 2nd and 13 pounds in 3rd gear (making it wickedly fast). I still think the car could dip into the 10’s with the current tune though (but not with me driving it).  Next year I’ll hit a few of the test and tunes and try and refine my launch.


Potsted by Cam, October 8, 2011

Announcing Princess Chloe

Three kids didn’t feel quite right. We were pretty sure there was a fourth one just hanging out in heaven, waiting for us to decide we were ready. But three was already a handful and I confess we spent awhile on the fence while deciding what to do.  In the end there was only one real choice…

Yesterday (October 6th) at 7:31pm we welcomed little Chloe into the world. From the first moment we met it was obvious that she was always meant to be part of our family. I heard someone say once that you can’t really love a baby- you don’t know them, they don’t know you, you can’t have a relationship with them. That’s wrong. I am her father and she is my child. It has always been love at first sight for all of my children. I am ecstatic that my family is finally complete.

Baby and mom are both doing great! Chole was a little different from Fran’s other pregnancies in that she was about a seven days overdue (although once she was born it was clear that developmentally speaking she was right on time). Chloe also decided to come out face up (posterior position) which makes delivery a bit more complicated. But Fran came through unscathed. We have had our last three kids at home, which – for us-  has made the birthing process more relaxing and less stressful.

For me a new  life is inspiring.  I don’t understand how anyone who sees a birth have any doubt that the process of life is underscored by intelligent design.  And I can’t fathom how anyone could ever think it’s okay to extinguish these tiny lives or harm these innocent children in any way.  Children are precious gifts and they are to be loved, adored and protected. My family is the single most important thing to me. Marrying my wife,  helping to create my children and providing for my family will always be my greatest accomplishments.


Posted October 07, 2011

Hoosiers Daddy!

On September 30th I’m going up to Rocky Mountain Raceway for the last of the midnight drags. If the stars align I’m going to run an 11 second quarter mile (11.9 seconds or less). I’ve got everything I need and I’m 99% sure I can do it…

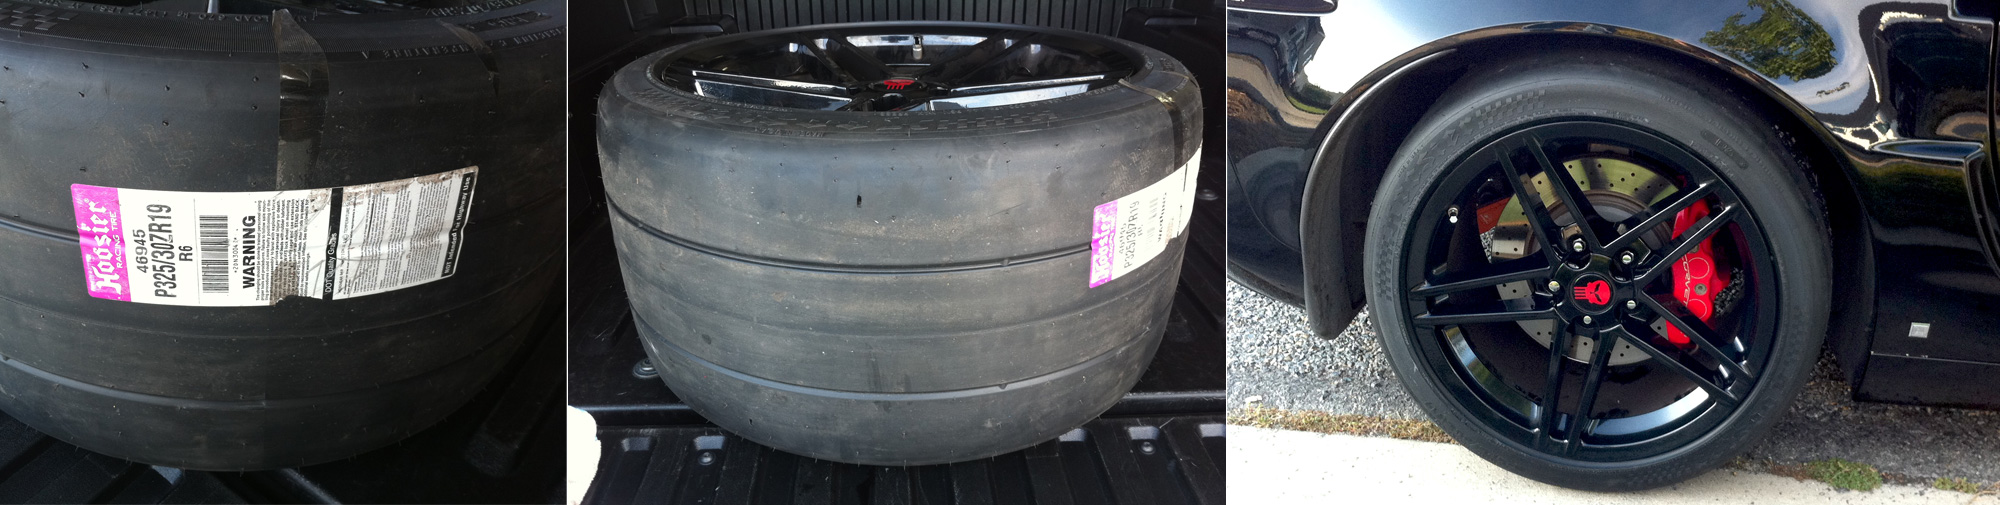
My biggest problem has been traction. Specifically that I don’t have any. Last year I picked sway bars over slicks… but this year I went with the slicks. I got set of Hoosier R6 drag radials and put them on my stock rims (which I was clever enough to keep).

The Hoosiers are a huge improvement! They are really sticky and grab way better than my Michelin PS2 street tires. I still spin pretty bad in 1st gear but when they hook there’s no spinning in any other gears. I got the Hoosiers from my local Discount Tire- they are super friendly guys and have great service (they matched an online price for me).

For the front I picked up a set of Michelin Pilot Super Sports. These are pretty light tires at about 25 lbs each. Every little bit helps…

The more rotating mass you can get rid of the better you’ll do. I chopped about 16lbs off the clutch/flywheel, another 12 pounds each for the rear wheels (stock rims w/ Hoosiers) and then 7 pounds each on the front wheels (stock rims w/ Michelins). 54 lbs of rotating mass. Gone.

And now I have some traction. Come on stars… align.


Posted by Cam, September 25, 2011

B&M Sport Shifter (How to Change Your Shifter)

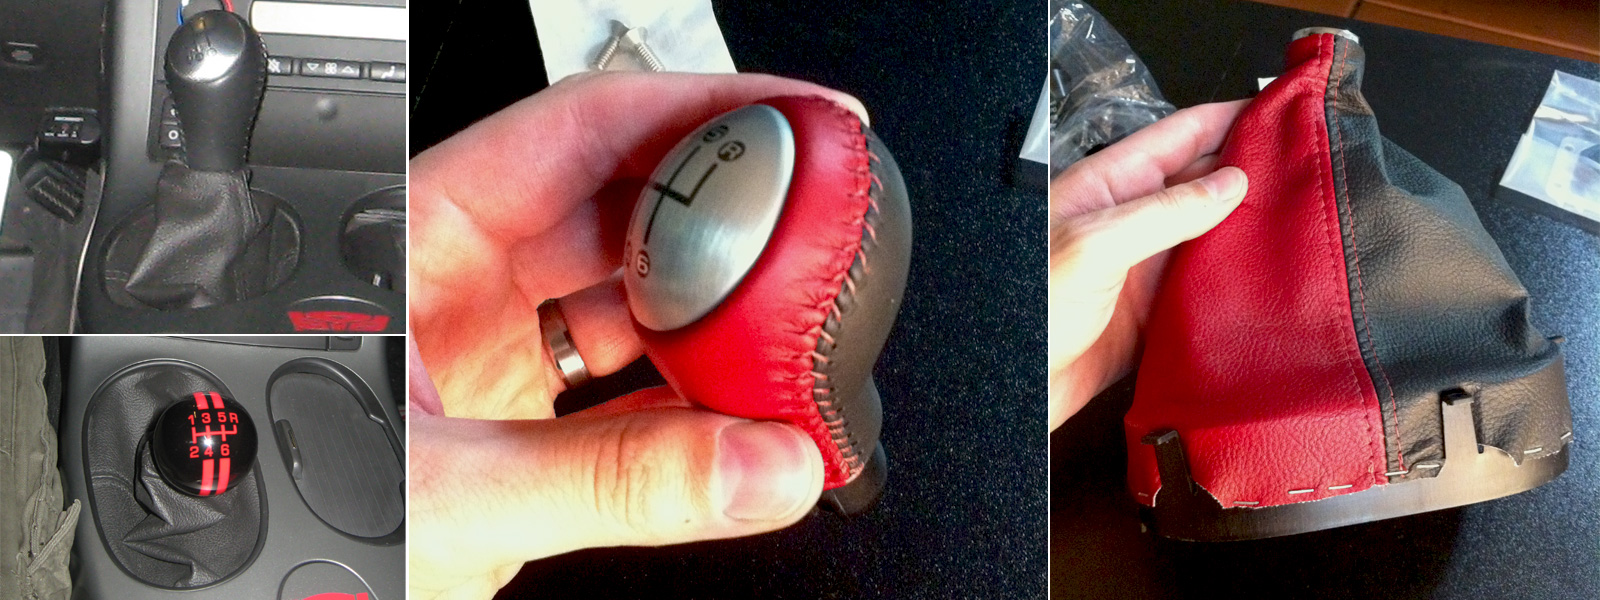
I decided upgrade my shifter, shift boot and shift knob.  For the shifter I decided to go with a B&M 45044 precision sport shifter. The shift boot & knob are OEM two tone cobalt red & ebony.

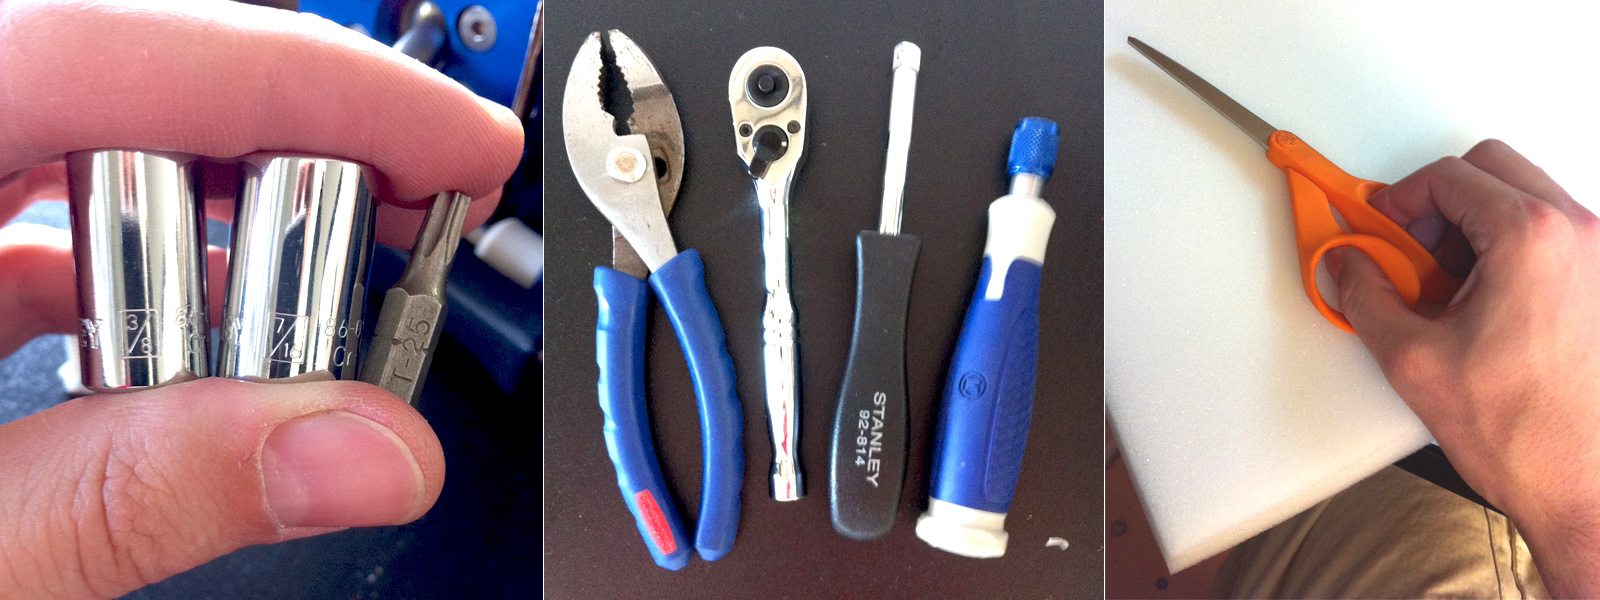
First things first. If you decide to swap out your stock shifter here are the tools you’ll need:  3/8 &  7/16 hex head socket bits & T-25 torx bit. You’ll also need drivers for the hex and Torx bits as well as a pair of pliers. Optional but also recommend: some high density flame retardant foam and pair of scissors.

Shift knobs come and go. The stock shift knob has a great feel, but I felt like the throw was too long and didn’t particularly care for the color on the gear pictograph. I swapped to a ball knob last year -which has the effect of lowering the shift knob thus reducing the throw- and I liked that okay, but when I saw the red & black boot and shift knob I knew it was time to swap again. One one little issue: the new knob was for a 2008+ Vette and I have a 2007.

I have actually had a B&M short shifter for a year or so, I just never bothered to put it in since it wasn’t compatible with my ball knob. I had originally considered the B&M shifter and a Hurst shifter, but chose the B&M model because it seemed to have a better design (more closely resembling the stock Z06 shifter).

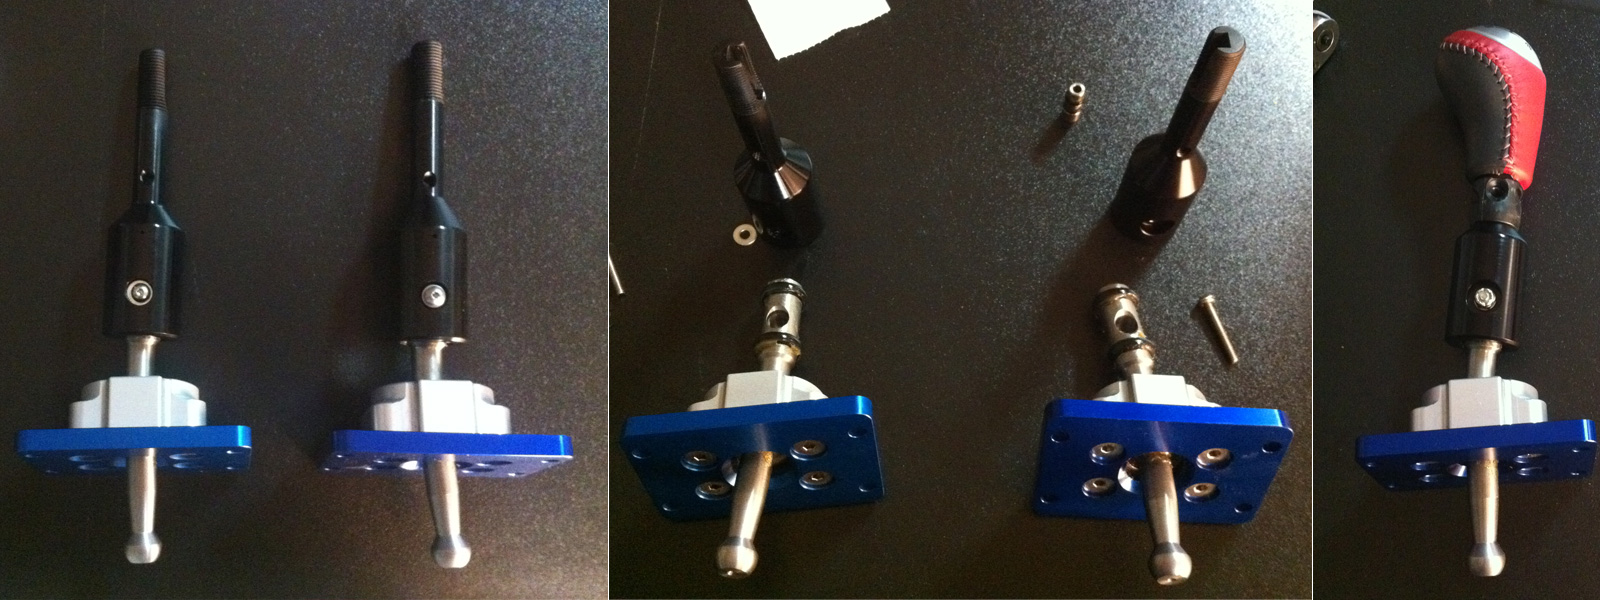
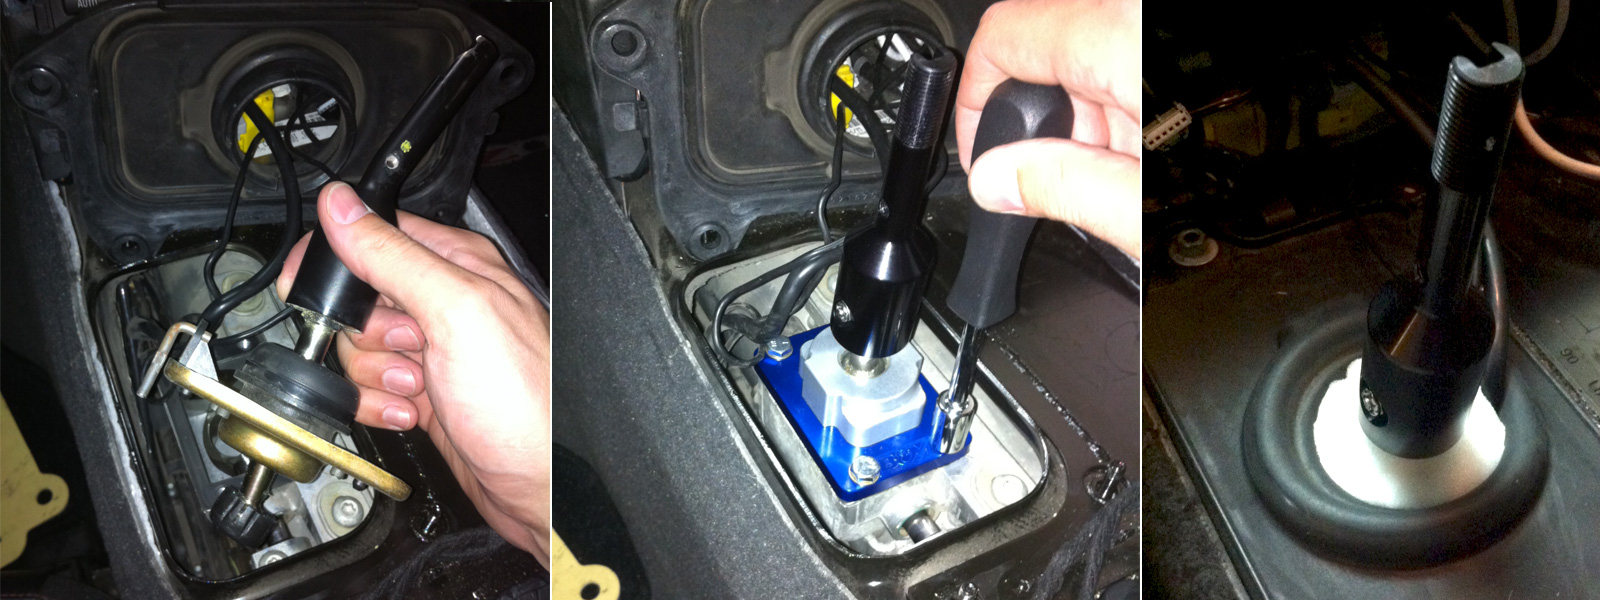
In any event, I was determined to get the OEM 2008 red & black knob onto my B&M shifter… B&M makes a 2008+ shifter model but no one was able to tell me if the shifter itself was compatible with my 2007 Vette (the transmission was changed on the 2008 Vette so it’s possible the shifters would be incompatible). I did the only thing I could think of- I bought the 2008 B&M shifter and swapped the shafts. Now I have a B&M shifter that I know will fit a 2007 Corvette and will take a 2008 shift knob (visually there did appear to be a slight difference between the two shifters).

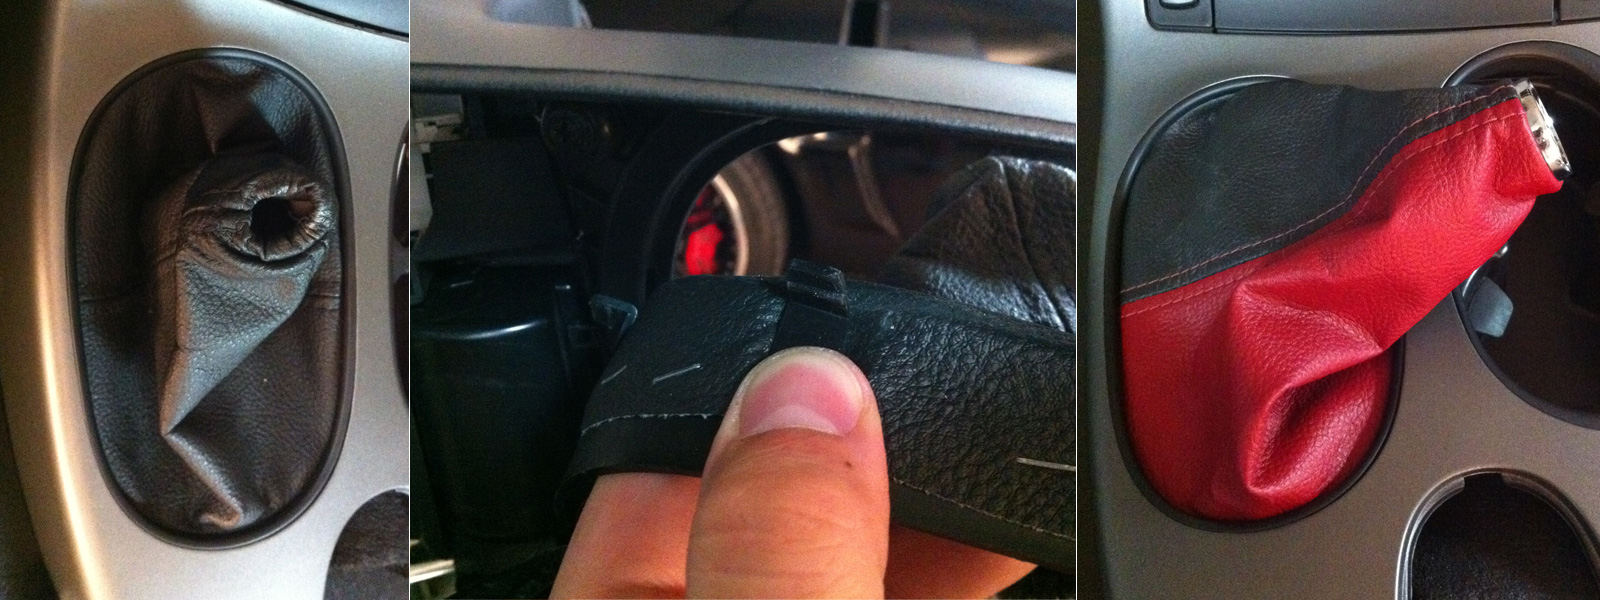
Swapping out the shift boot is cake. It’s easiest if you remove the Corvette center console (which you have to do anyway to swap shifters). The leather boot is attached to a plastic ring with tabs. From underneath you just pop out the tabs from the console. Then pop in your new shift boot. Oh two tone shift boot, how did I live without you?

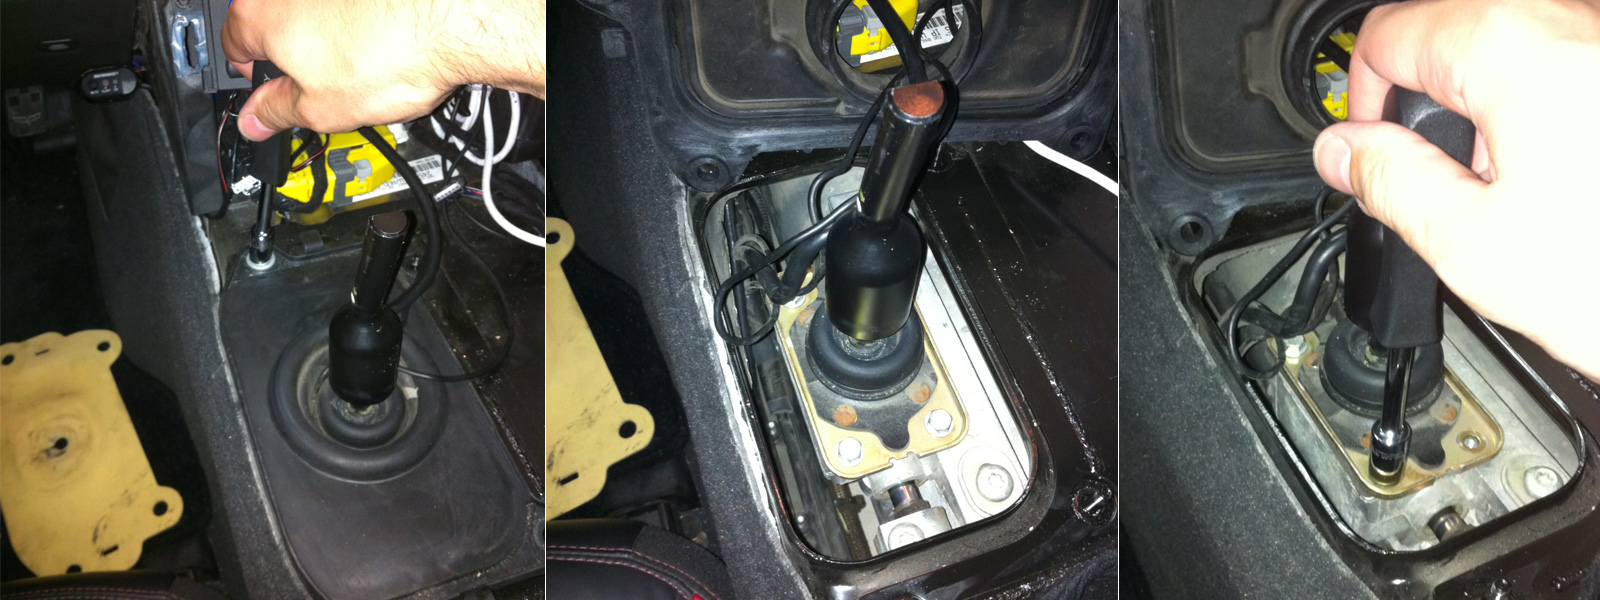
Swapping out shifters is also pretty painless. Once the console if off it should only take about 10 minutes. Just pull off the yellow rubber cover and unscrew the four bolts (3/8) and move aside the black rubber seal (your car isn’t going to have the wires coming out from the transmission- these are for my wideband). Next remove the 4 screws that hold down the stock shifter (3/8).

The stock shifter just pulls right out (put the car in neutral while you make the swap). You need to take the black plastic cap off the stock shifter (pliers) and then pop it on the B&M. Next bolt down (7/16) the B&M where the old shifter was (I left the stock gasket) and put your black seal back on. There are a number of other steps you might need to take if you’re working with a C5 Vette but they are documented in the instructions. Shift through your gears to make sure things are working okay. Since the B&M doesn’t seal quite as well as the stock shifter I used foam to make a sound dampener.

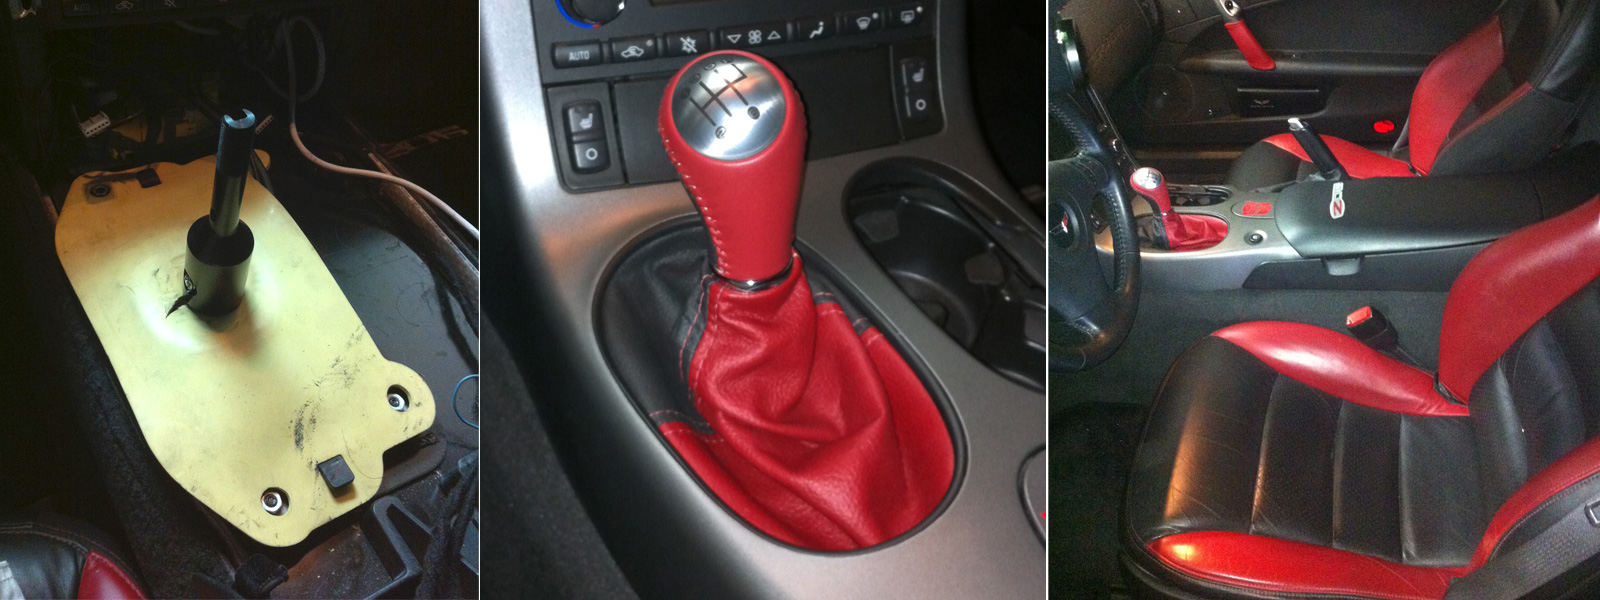
Make sure everything is nice and tight, shifts well and is put back together correctly. Then you can reassemble your console and admire your work [One side note that I didn’t document with any pics- the shifter screw included with the B&M kit is a T-25 and the head was so large I had to grind it down a ton get it to fit over the boot collar]. Personally I love how the new shift boot & knob match the seats and door handle wraps.

B&M 45044 precision sport shifter (Corvette) Review

Now that I’ve used the shifter for a few days I have to say that I’m pretty impressed. The shifts with the B&M are short and crisp. The shifter centers tightly making it much easier to get into third gear, as well. It takes a little more effort to move through the gears but the shorter throw makes up for this hands down. In fact, there’s almost something appealing about the extra force that’s required (especially when using an OEM shift knob). There’s no extra noise from the B&M and vibrations are about on par with my old stock shifter (in other words, very minimal). The stock Z06 shifter is very easy to move, but it always felt spongy and it was too easy to miss-shift. The B&M has and does everything I felt was missing and really makes the car more fun to drive. I would recommend the 45044 to anyone who’s considering it.


Posted by Cam, September 24, 2011

An Even More Awesome 1978 Corvette!!??

I really have to stay off eBay. Yesterday there was that beautiful ’78 Vette. It was a little tempting, but it wasn’t quite what I was looking for. If I could pick the perfect configuration I would have wished for a 1978 Corvette with a manual transmission (the other is automatic) and a black leather interior (the other had grey). Earlier today I noticed another 1978 Vette has been listed on eBay by the same seller as the other car. At first I thought it was the same car but soon realized this was another 1978 model with the exact specs I wanted. Ahhhhhh!

Do I need it? No. Do I want it? Yes. Would I love it? Yes. You just never know when the perfect thing will pop up on eBay. A car like this may roll around every few years or you may never see one again. What to do, what to do…

Gotta let this one slide. As I mentioned in my last post I already have way to much to do and taking care of another car would be a pain.  Besides, if I’m going to spend the money I’d rather put it into the car I already have (is there an LSX block in my future?). Maybe one day…


Posted by Cam, September 21, 2011

Awesome 1978 Corvette!!

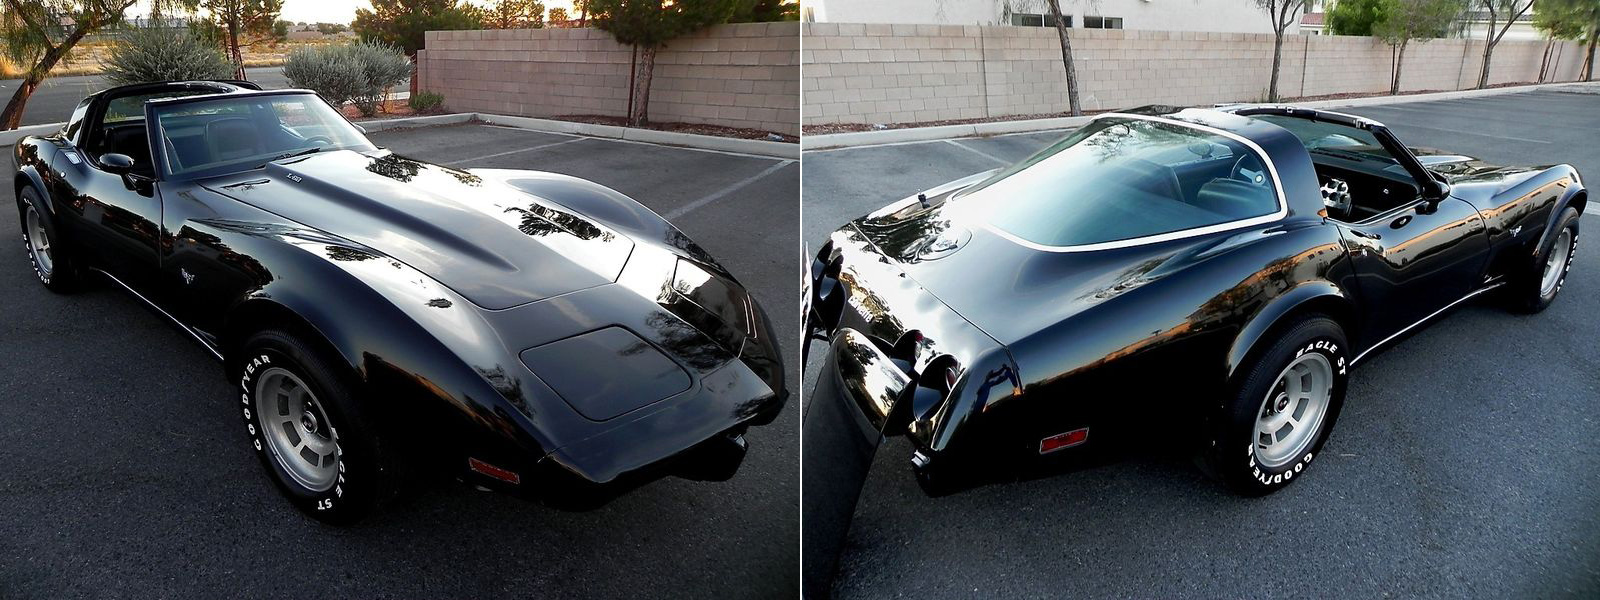
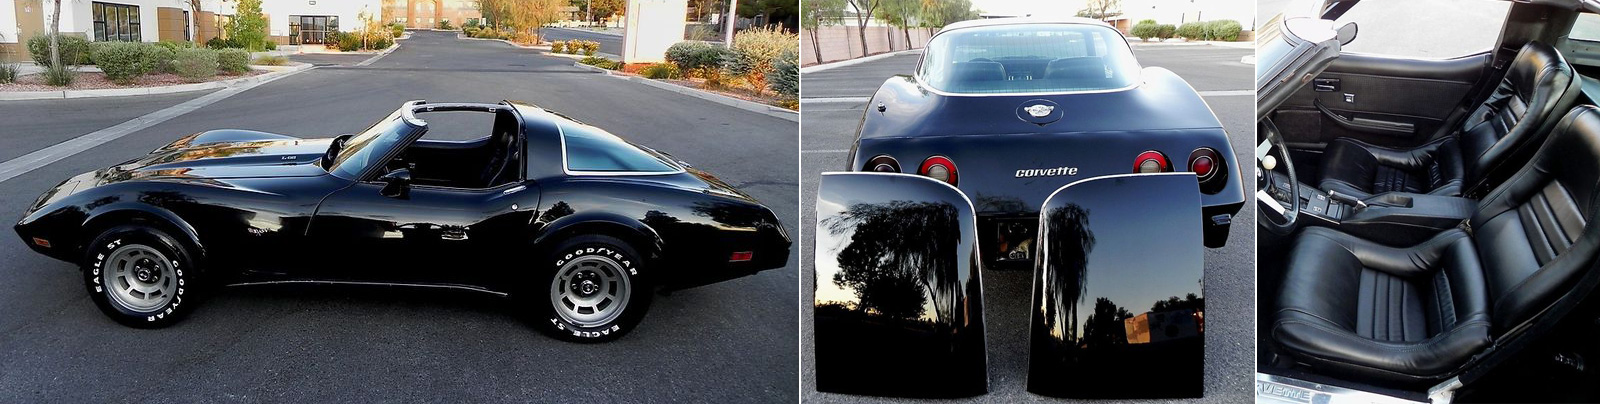
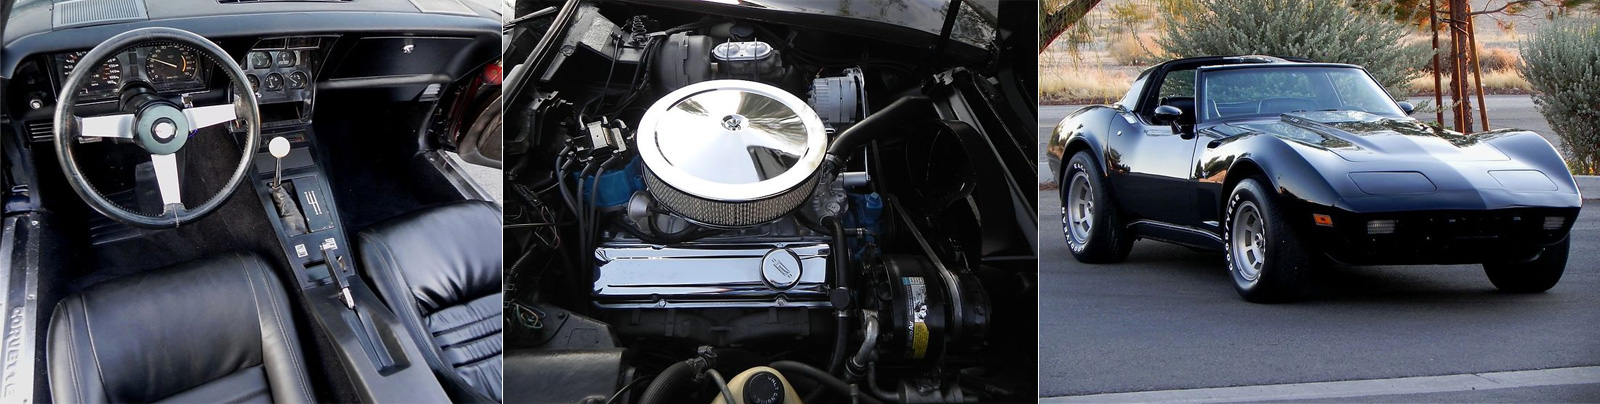
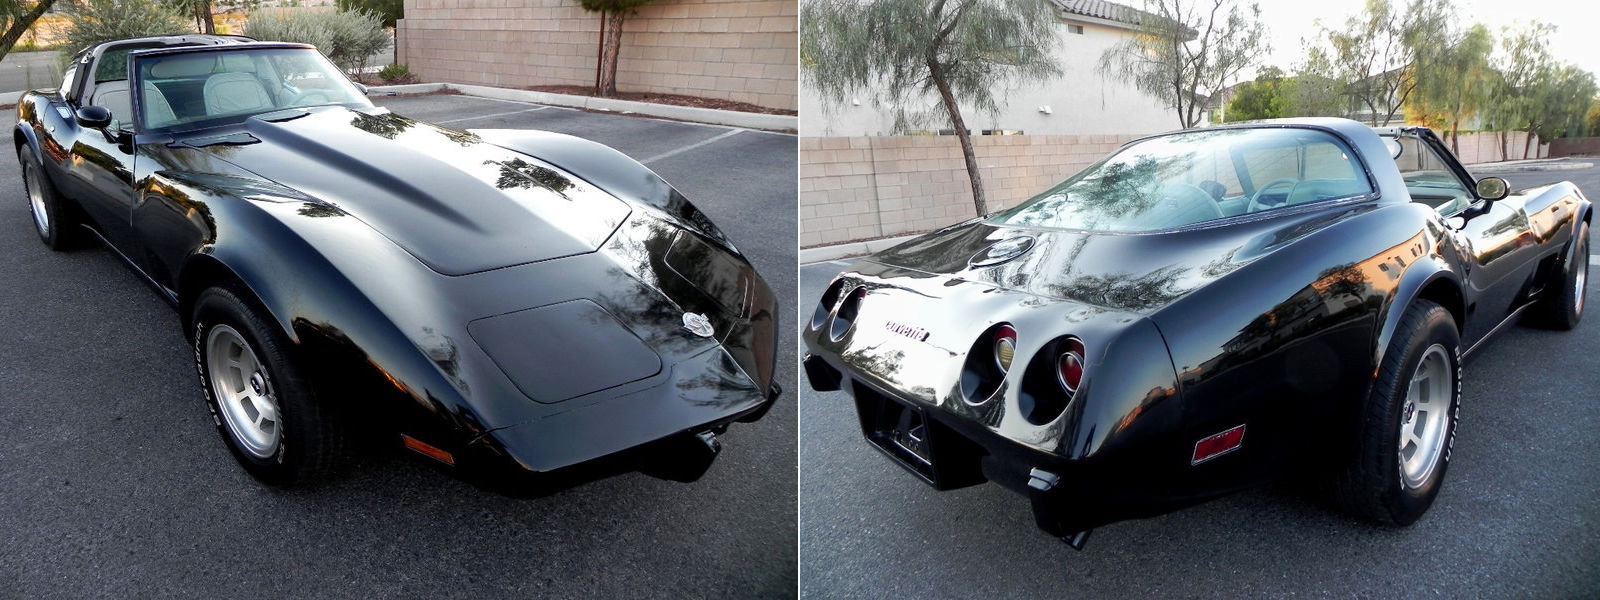
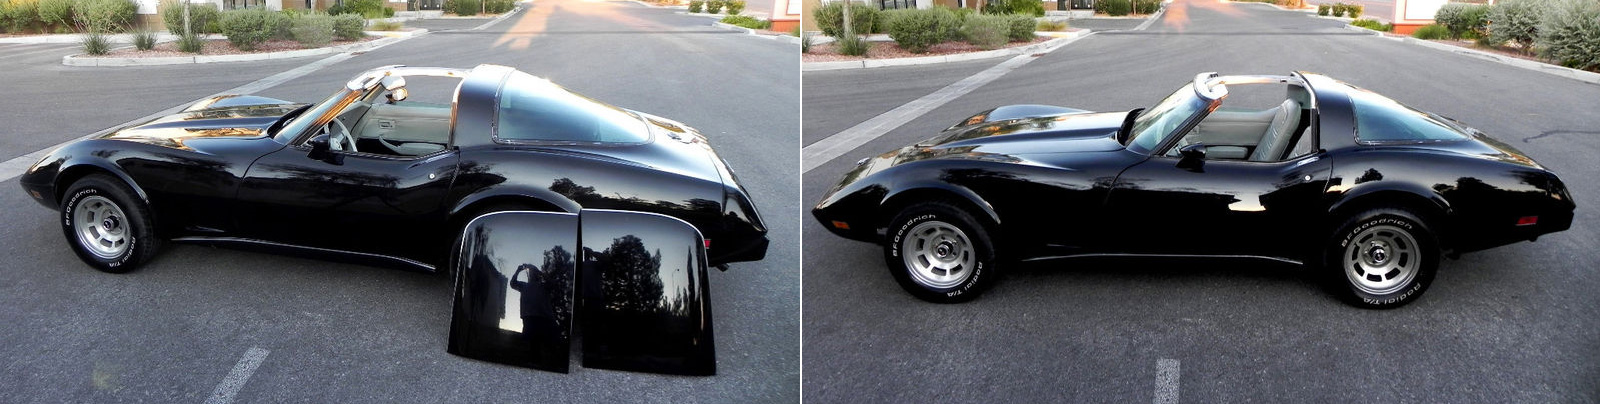
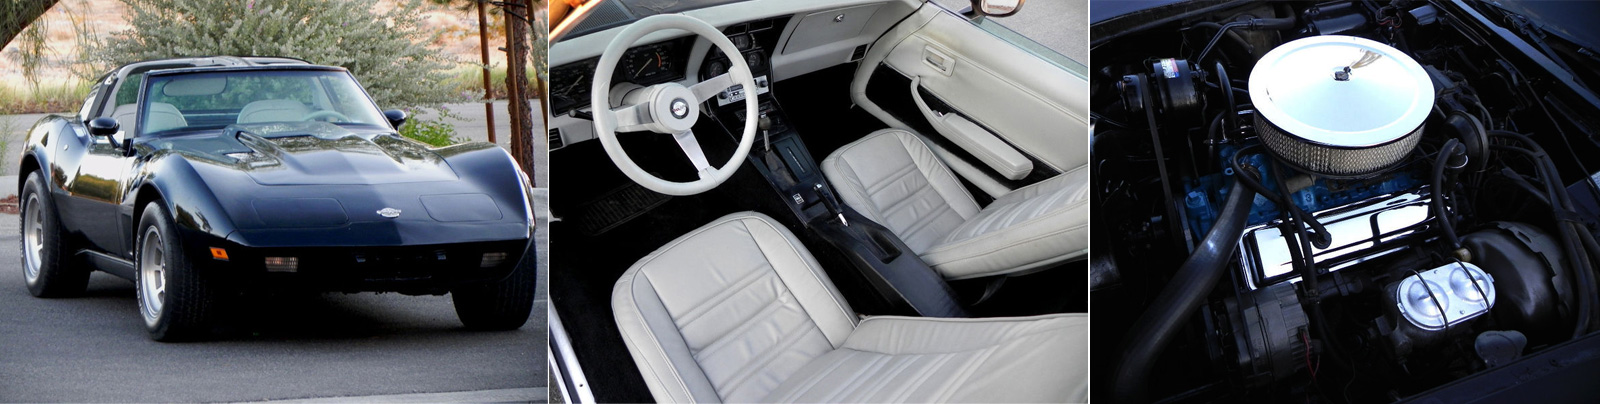
I don’t know why, but every so often I go to eBay and search for Corvettes. In addition to turbo and supercharged Vettes I always look for black 1978 Corvettes. For some reason or another I am hung up on the idea of driving around a car that was “born” in the same year as me.

Lo and behold, I ran across this beauty the other day! I toyed with the idea of getting it (I thought it was a steal at around $10K) but I don’t have any place to put it and I don’t have time to work on it. It sold pretty quickly and I think the new owner is going to have a blast. Anyway, I just wanted to share this awesome ’78 Vette.

Maybe one day…


Posted by Cam, Spetember 21, 2011


Home, Moved & Settled In.

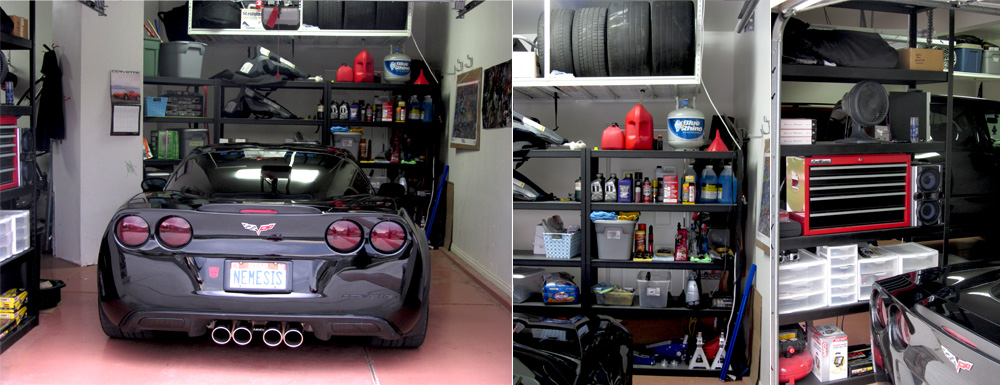
Anyone who has ever moved knows it can take forever to settle in. It’s easy enough to deposit your junk in a new location but finding the right spot for it and creating a good feeling in your new environment can be challenging. Ever since I moved my car back home I’ve been working on getting things in my new location organized. I think I’ve finally done it and consider myself settled.

I spent this past weekend sorting tools, separating cleaning supplies and car parts, adjusting shelves and shifting stuff around until it fit just right.  I was able to put my old set of tires on the storage rack above the back shelf (I don’t swap tires often so it works pretty well). The back shelf turned out really well and I’ve got the shelves organized by car fluids, cleaning supplies and jacks. My side shelf is organized by tools, books and car parts. I crammed in a Sony Stereo & a fan too.  I even hung my old license plates on the wall (yeah, for real). 

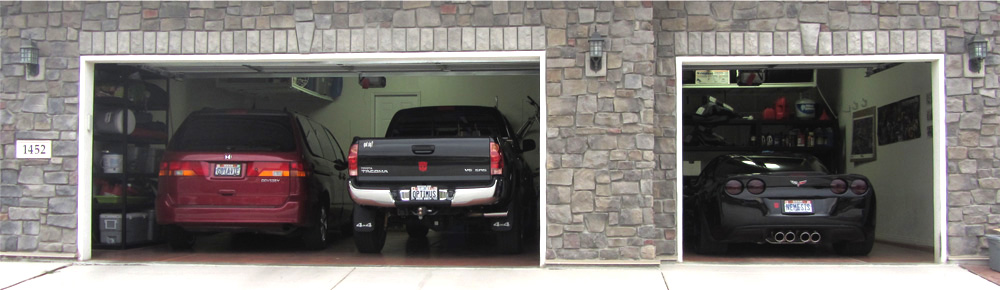
I’m really happy with the results. In fact our whole garage is pretty organized these days. Maybe it seems silly, but it brings me a great deal of satisfaction that we can actually fit three cars into our three car garage. I’m often shocked when I drive by houses and see the second or  third car garage crammed with junk (or worse stuff spilling out from every garage). If you have that much stuff get rid of some or get a storage unit. I’ve always felt the garage is just another room in the house and should be kept neat & clean.

Anyway, now I’m home, moved and settled in. Feels good! Now we just have to finish settling into our house…


Posted by Cam, September 10, 2011