It’s true. You’ve heard right! I have done more stuff to my car. No one cares and I get that. But I care. It’s fun for me to post these little enhancements on my blog. And you never know- they might actually help someone who’s putting in the same stuff. If you decide to read this, fine. But I’ll just be upfront: this will probably be very boring and mildly technical. And naturally I’ll give you the “these pictures don’t do the mods justice” disclaimer. They are puzzle pieces of a much larger picture. Once the puzzle is done I’ll wow you with some full body shots. Yeah, you can’t wait. I know.
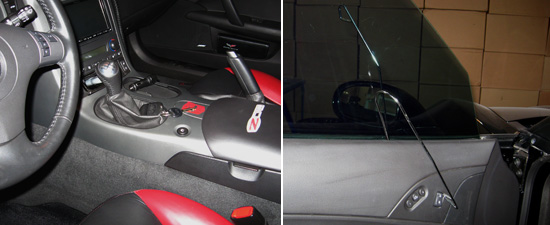
Guess what I have on my steering wheel? Anyone? Stereo controls. It’s been bugging me for a year: steering wheel stereo controls that don’t control my stereo. But it’s okay now. I’ve remedied the situation with the PAC SWI-PS steering wheel control Pioneer stereo interface.

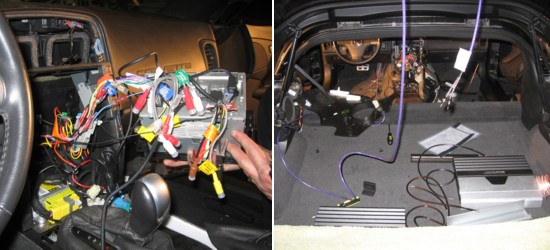
My Pioneer Avic Z-1 was ecstatic (”For me? Really? Oh wow. I don’t know what to say!”). All I had to do was wire the PAC unit in and control away! After I got the car’s center console removed I had second thoughts (deja vu, right?). After attending several years of trade school to become an electrician I began the project. First off, I just want to say that I found the instructions for the PAC system unnecessarily confusing. They provide three different sheets of instructions (programming info, stereo harness diagrams, and car / PAC interface / version info). If you’re going to install this little guy just use the online instructions.
I got the PAC unit wired into the car’s original stereo harness just fine but I had a heckuva time finding a 12 volt power source that was tied to the ignition system. Jim to the rescue! Jim’s knowledge of electrical systems surprised me (and possibly him too) and he proved an exceptional ally as we waged war against the mess inside my car. We found a suitable 12 volt source and a ground and had the PAC interface working in nearly no time. The Z06 steering wheel has a larger “1-6″ button that the PAC really doesn’t accommodate. I’d recommend mapping the “mute” function to it (a very handy function).
After all the excitement with my stereo I decided to take a break and tackle an easy problem. When you work on a car sometimes you need the hood up (to pull a fuse, run a wire, charge the battery, etc). The Z06 hood has a small light that comes on when it’s open. The light never goes off. I used to pull out the bulb, but then I had to put it back in. Out, in, out, in. What a nightmare. I decided to put in a switch. Now when the hood is up and I don’t need the light I just switch it off. Best thing ever.
Well, except for black anodized custom painted aluminum engine caps… I’m trying to get a black/red color scheme going for the engine. I bought these black aluminum caps and then painted the vehicle markings on them myself. They actually turned out really well. Vanessa loves them. Remember, Vanessa is the car. Who’s crazy?

Anyway, it was finally time for a wideband. In a nutshell a wideband is a sensor that will tell you the air/fuel (A/F) ratio of the exhaust. With that information you can determine if your car has too much or not enough fuel. I bought HP Tuners awhile back and now I’ll be able to [more] safely use it.
The wideband installation was a job. I purchased an Innovate Motorsports LC-1 kit (which so far I would recommend). It comes with a gauge to display the A/F ratio. Cool! But that meant that I had to switch out my two gauge pillar (which has fuel and boost pressure gauges) with a three gauge pillar. No sweat, right? Advice: When switching out gauge pillars don’t try to make anchor pin holes in the same spot as the old gauge pillar. Just pull out the pillar trim, drill new holes, wire everything up, attach the gauge pillar back to the trim and put it back in.
Getting under my car is tricky so I took my her to Vince (of Lung Automotive). I had him weld in a sensor bung and then run the LC-1 control module. He poked the leads out through the shift boot which seems to work really well. Thanks Vince! And once again Jim came to the rescue and assisted me with the wiring portion of the project. Advice: The instruction manual for the LC-1 notes that there are two wires which have to be soldered together. It’s not kidding. Crimping won’t work. You have to solder them. Jim proved to be an adept soldering iron handler as well. It would have been difficult to achieve such exceptional result without his help. Thanks again Jim!

The gauge itself is pretty basic (I might upgrade to the XD-16 if the wideband proves to be useful). It’s a bit bright and the constant flickering as the A/F changes seems like it’s going to get annoying. Maybe the gauge will need a switch like my hood light! I know a guy…
And finally I decided that I’d upgrade my pedals. In retrospect I don’t really know why. The clutch and brake portions of the upgrade are just cosmetic overlays, but the whole accelerator is new. Advice: Don’t try and unhook the wiring harness on the accelerator without being able to see what you’re doing. You should be able to get both of the bolts (13mm btw) out and remove the pedal with the harness still intact. Then you can pull the pedal out and see how to unhook things. It’s a super tricky harness (with good cause).
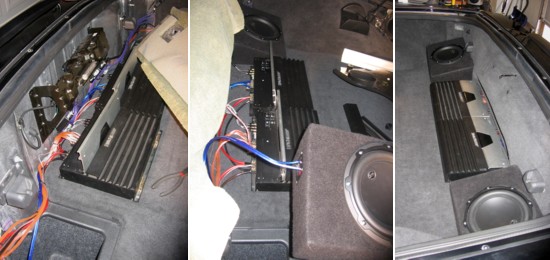
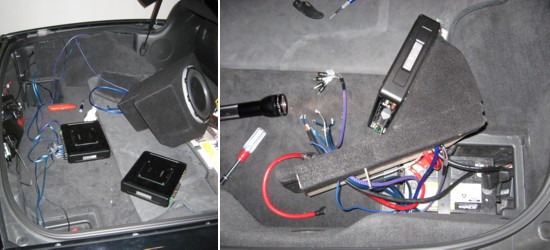
And finally, it was time to say good by to Mr. AcDelco. That’s my old battery. It served me poorly for the last year before finally giving up the ghost this past winter. It’s actually very difficult to find the correct battery replacement for a 2007 Corvette z06. In fact I couldn’t. I ended up getting a DuraLast with similar specs (same cold crank amps- very important). Justin helped me purchase and install the battery. The battery is located in a compartment in my trunk and I have my amp rack and speaker wires sitting on top of it. Advice: If you have you battery inside the car like I do and you end up getting a replacement that’s not quite the same as the original remember to make sure the new battery is vented.
Well that blog post was almost as much work as actually doing the car mods. Next up, I’m going to finish my stereo and then start working on my new engine (LSX block). 1000WHP ready or not, here I come.
Originally Posted March 21, 2010

 Speaking of a little faster… That’s what I plan to be shortly. I recently picked up a copy of
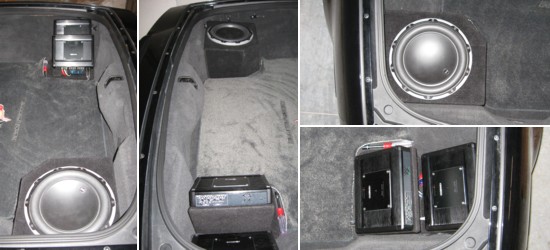
 I relocated my trunk lights to the center (previously they were on the corners where the sub and amps now go). I think I like them better there
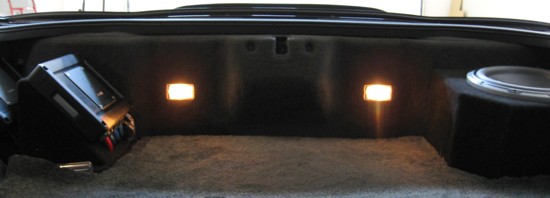 Instead of two 8″ JL Audio W3 subs I went with one 10″ JL Audio W6 (it’s a beast). I’m running matched Kenwood Excelon amps. Since I only have a single sub this time we tried to balance the visual presentation by putting the amps in the other corner. Overall I think it turned out great