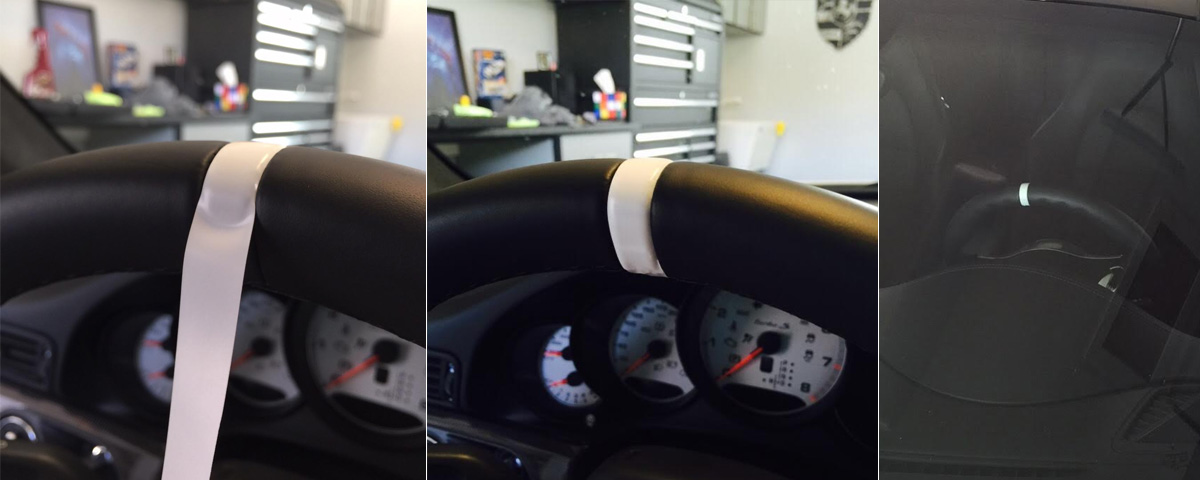
I recently wrapped some white electrical tape around my car’s steering wheel. The 911s have an independent section of leather on their wheel and so the tape slips into the grooves and nearly looks like stock offering. Although I thought of this and tried it all on my own it appears from having later Googled the idea that others have attempted similar things.
Practically speaking, I think it’ s a great visual addition. The tape had held in place just fine. No stickiness or peeling issues. The electrical tape is vinyl and so it’s easy to clean. The best part was that it only set me back about $4. A highly recommended aesthetic modification.
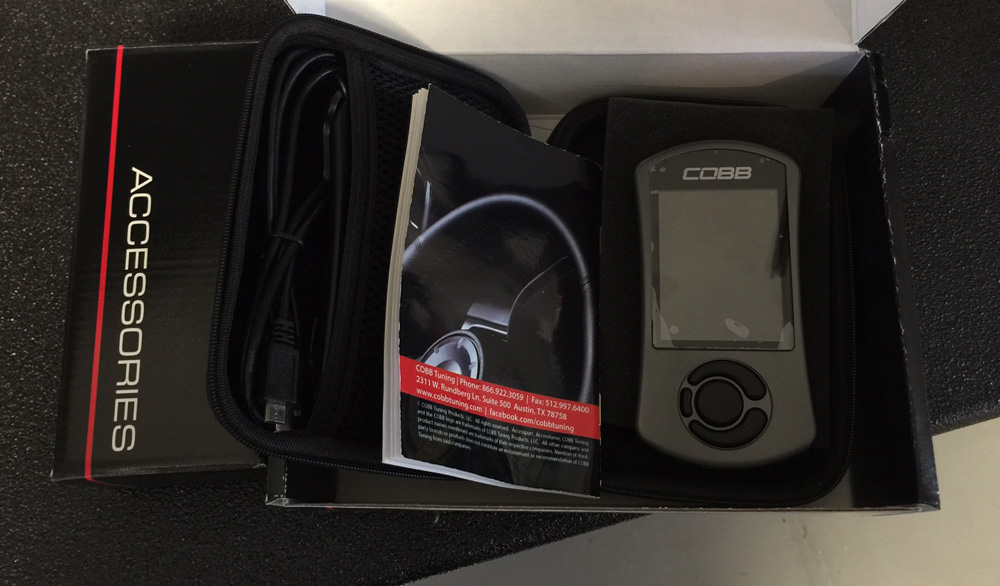
Following the aftermarket part installation it was clear the car was going to need some tuning. This time around I decided to use Cobb and their Access Port. Back when I had my 997 I had to take out the ECU and send it in to EVOMS (shudder- such bad memories of those guys) to get a new map flashed onto the car. This made it nearly impossible to make small adjustments. However, the Access Port (AP) allows you to flash the a tune onto the car’s computer though the OBDII port! You can load on a new tune in just a few minutes. Additionally the AP logs data which you can send to a Cobb tuner and they can make adjustments as needed for you. This is a game changer.
COBB Access Port Tuning Module- this is where the magic starts & how we make the magic faster.
Right out of the box the AP comes standard with a slew of off the shelf (OTS) tunes. Before putting my new parts onto the car I installed the OTS stage 1 tune. The low end seemed more powerful but I didn’t notice much of a difference up top. After the parts were installed I uploaded a stage 3 OTS tune. Again, more bottom end power but very little difference up top. It’s tricky to get a good tune in Utah. I’m fighting high altitudes, catalytic converters (restrictive) and low octane (91 standard here). This is one reason that it’s so important to be able to log data and make tune modifications.
The Cobb Accessport is a very cool piece of hardware. It allows you to tune the car from the OBDII port! After installing the Access Port software onto your car you can upload new tunes. The tunes can be tweaked by logging data (via the AP) and then sending it to a qualified tuner.
I’ve been working with Sam (at By Design) and Mitch (at Cobb) to try and dial in the tune. While there’s a lot of stuff I understand, there’s plenty that doesn’t make a ton of sense to me. When I look at all the data from a logged file some columns leave me scratching my head and I’m forced to put quite a bit of faith in the tuners. Below is a 0-140mph run of my third tune version.
The corresponding times for this run were pulled off of the Cobb Access Port.
0-60 in 3.013
60-130 in 9.693
0-130 in 12.706
At this point I didn’t have a good way to measure a quarter mile run. As I look back in time there are quite a few things I wish I had done differently- gather timing hardware beforehand, test and measure the car in stock form and measure results of each tune iteration. Hindsight…
I’m up to version 4 of my custom tune at this point and the car seem to be running well and I can finally feel a bit of the torque in the upper end. Probably one last tune will eek out all there is with the current set up. Realistically that won’t be much more than I’ve already got- there’s just too much working against us here.
After loading in version 4 of my tune I did an experiment and put some octane booster into my fuel (real octane booster). The data logs looked so clean it was unbelievable (almost no preignition / knock) and the car gained nearly a second in the 0-130 range. With tune version 4 and 93-ish octane here’s what I ended up with (these were measured with a VBOX and a mini review will be posted shortly):
That’s not too bad! I finally have a 10 second Utah car. Apparently if you live in Utah, spend a butt load of money and put in premium gas that we don’t even have here you too can run stock times! Yes, sadly these are pretty much the same times one might run if they lived in California at sea level and had just driven the car off a dealer lot.
Admittedly that leaves me perplexed- it’s hard to understand why a forced induction car would run so much slower in Utah given that the car should be putting roughly the same amount of air into the engine (turbos compensate fairly well for altitude). My goal is to find a stock Turbo S that I can measure at some point to see what a baseline speed might have been. I’m probably being way to scientifically anal about things but I want answers!
If my research pans out I think I’ll look into a methanol kit. A methanol system would give me the equivalent of 115 octane. Given the positive effects of octane I’ve seen I imagine that this would add a significant amount of power and top end speed. I am clearly not very good at being content.
Update: Somehow I managed a new best time of 10.88 in the quarter mile… with plain old 91 octane in my tank. I wish I had logged that run (I have 3rd gear pulls from the same round I can look at though). The worst part was that I had my GoPro setup but forgot my memory card (ahhh!). Maybe octane wasn’t the magic ingredient- I will have to explore this a bit more.
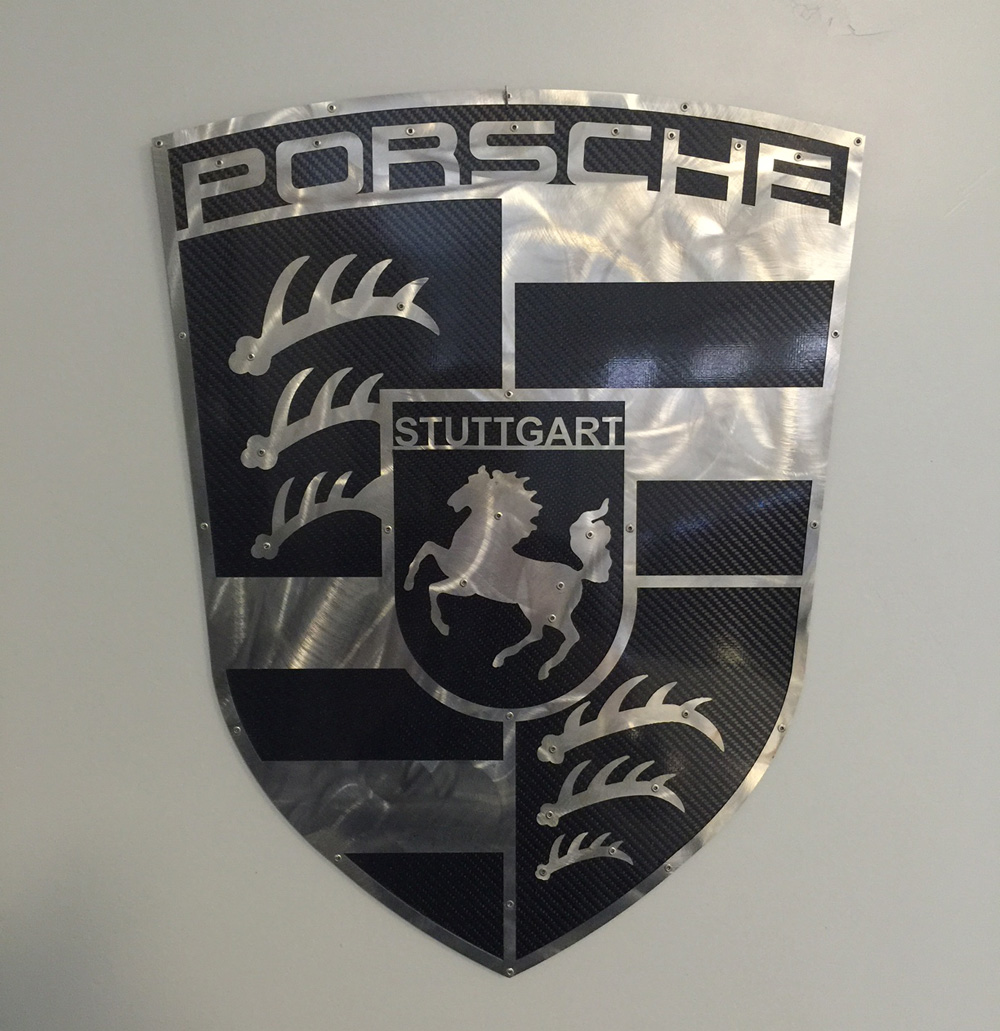
I swore I would never do it again, but he siren song of aftermarket parts and more power has always proved to strong to resist… There are so many well developed and proven upgrades and technology for the 991 that I felt comfortable giving them a shot. I teamed up with Fabspeed, IPS, ByDesign, Cobb Tuning and Ken Garff Porsche for the build. It is, thus far, one of my smoother builds to date.
I bought this cool wall art from Fabspeed. Then they asked me if there was anything else they would help me with. That was the beginning…
I collected everything I needed over the next month (more on that in a second) and made the necessary installation arrangements.
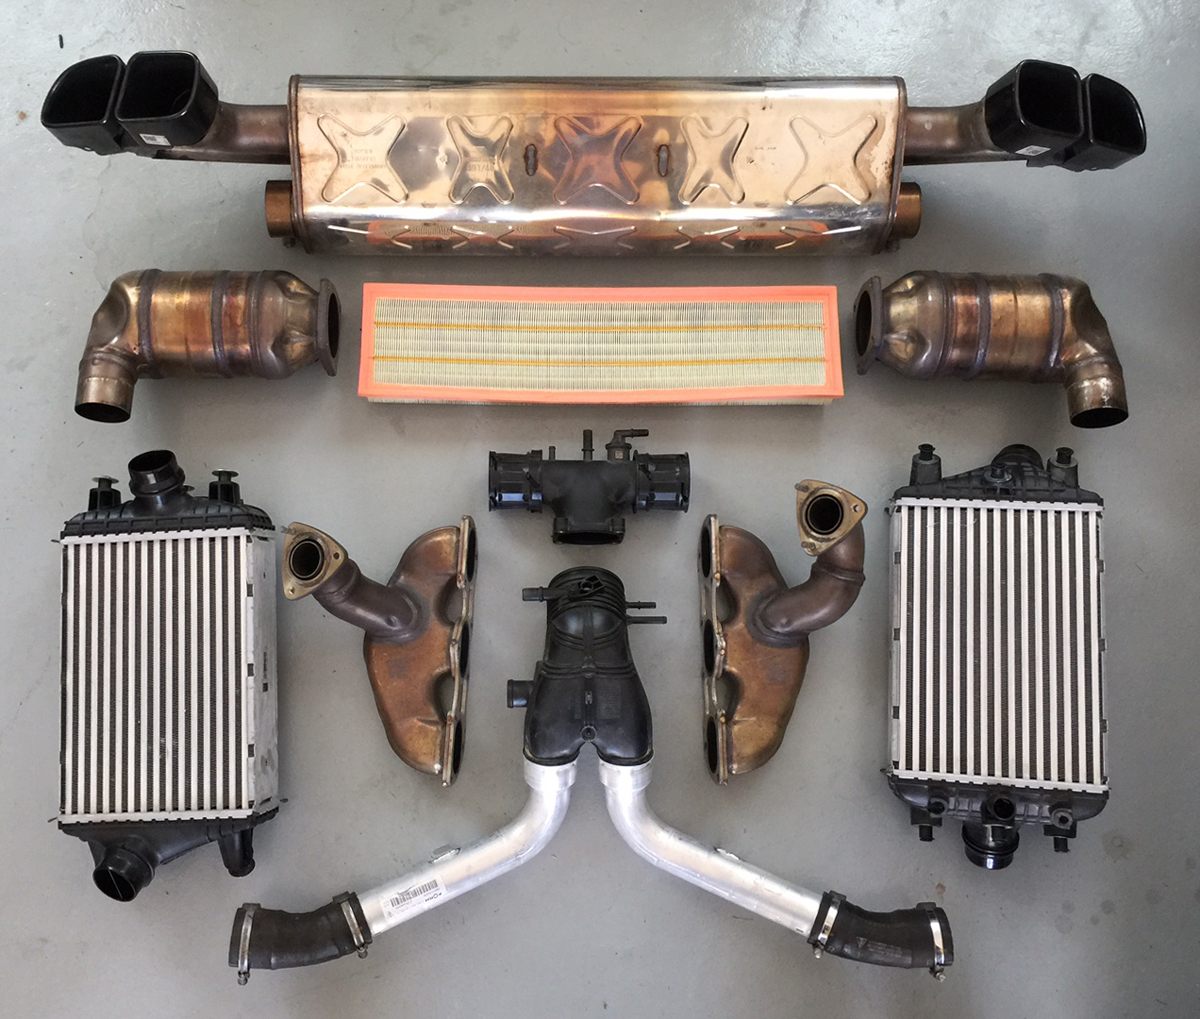
This is what came out of the car:
The old parts they took out look so much worse than the new stuff going in that it’s hard to believe! This is the old muffler and exhaust tips, the old catalytic converts, exhaust headers, air filter, intercoolers, plenum and Y-pipe.
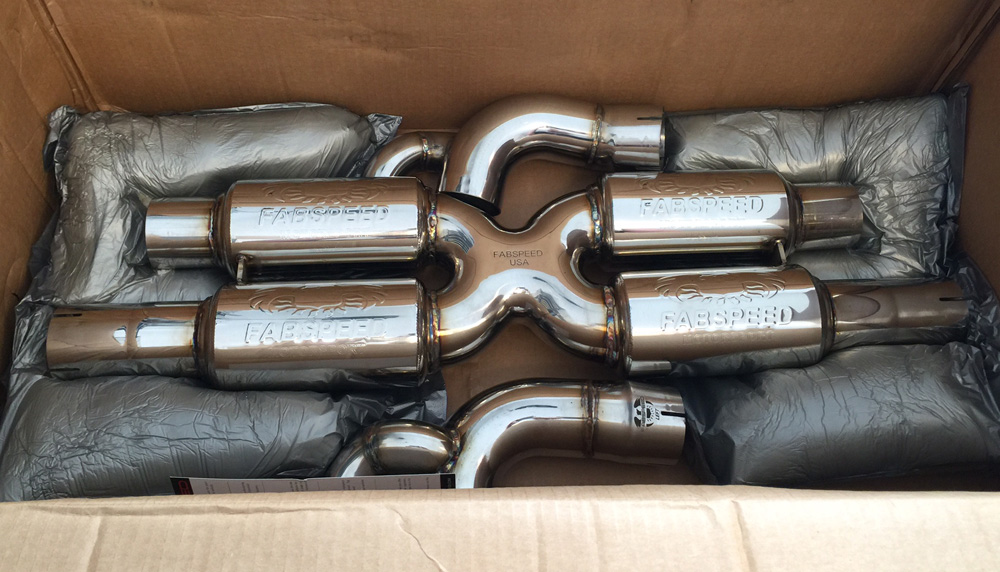
And these are the new parts that went into the car replacing the items above:
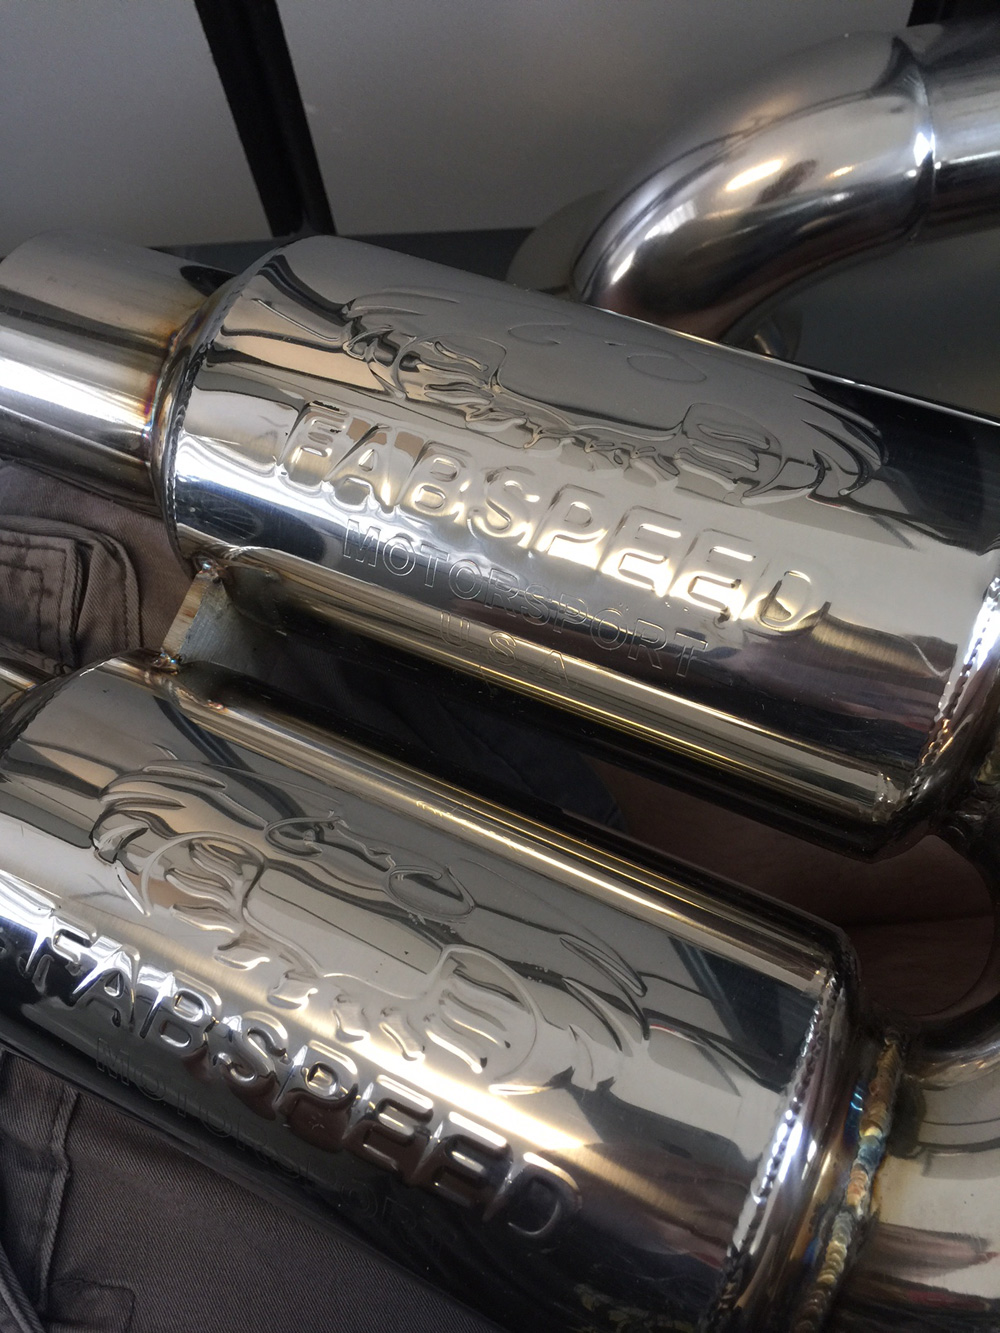
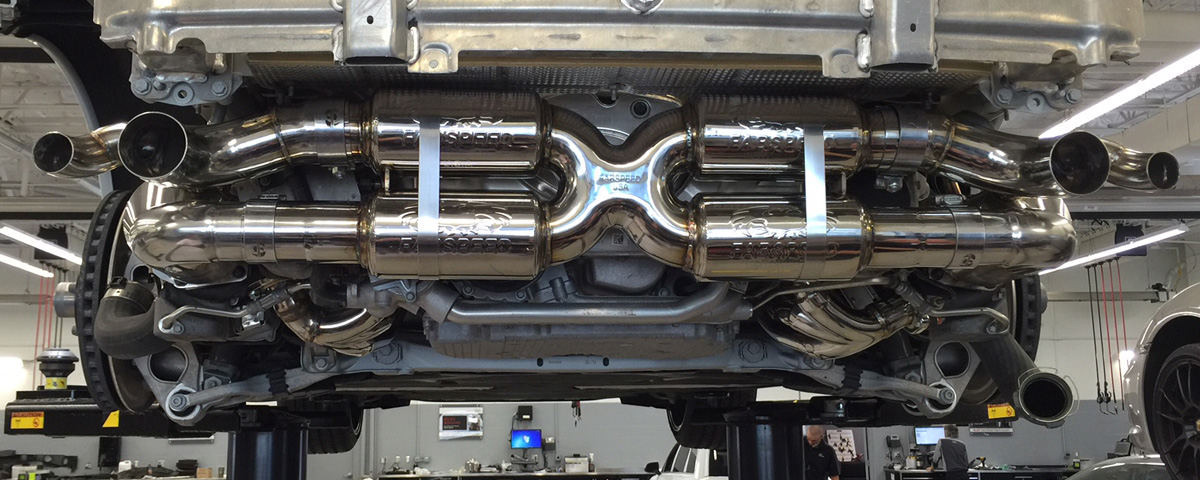
Fabspeed X-pipe exhaust
Fabspeed X-Pipe exhaust detail.
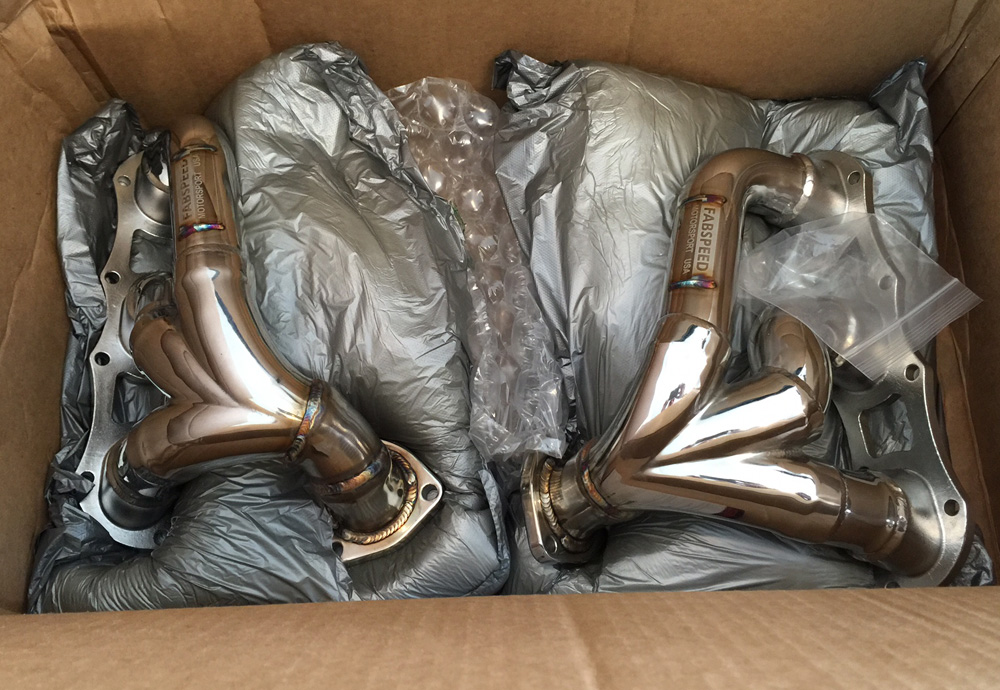
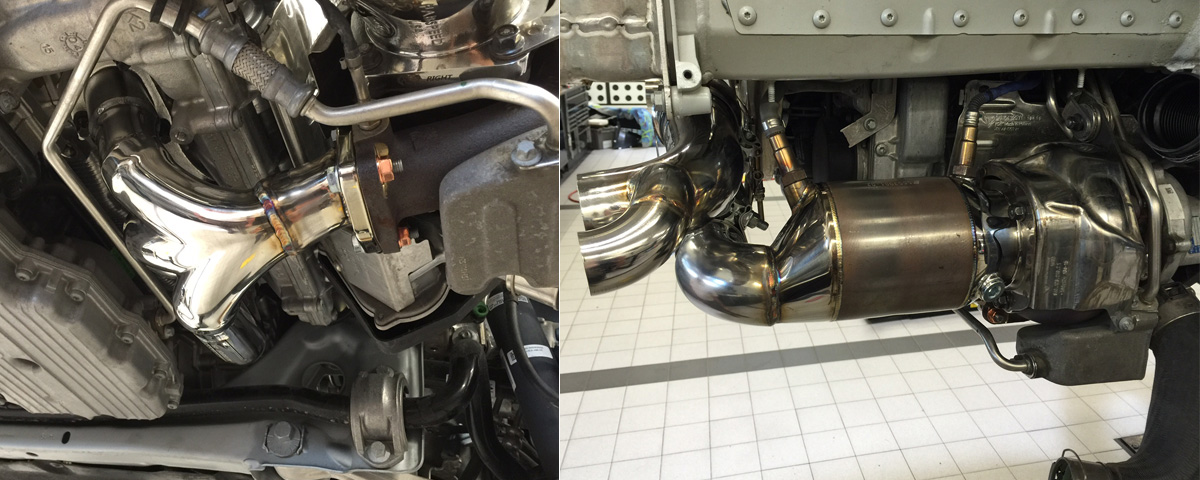
Fabspeed headers
Fabspeed header (detail)
Fabspeed catalytic converter
Fabspeed black ceramic coated exhaust tips.
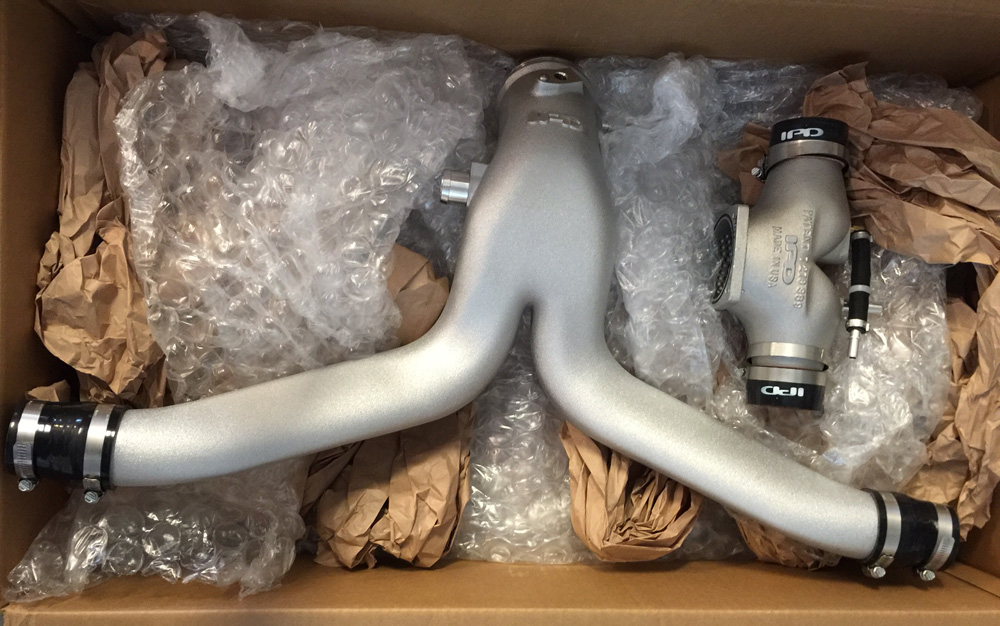
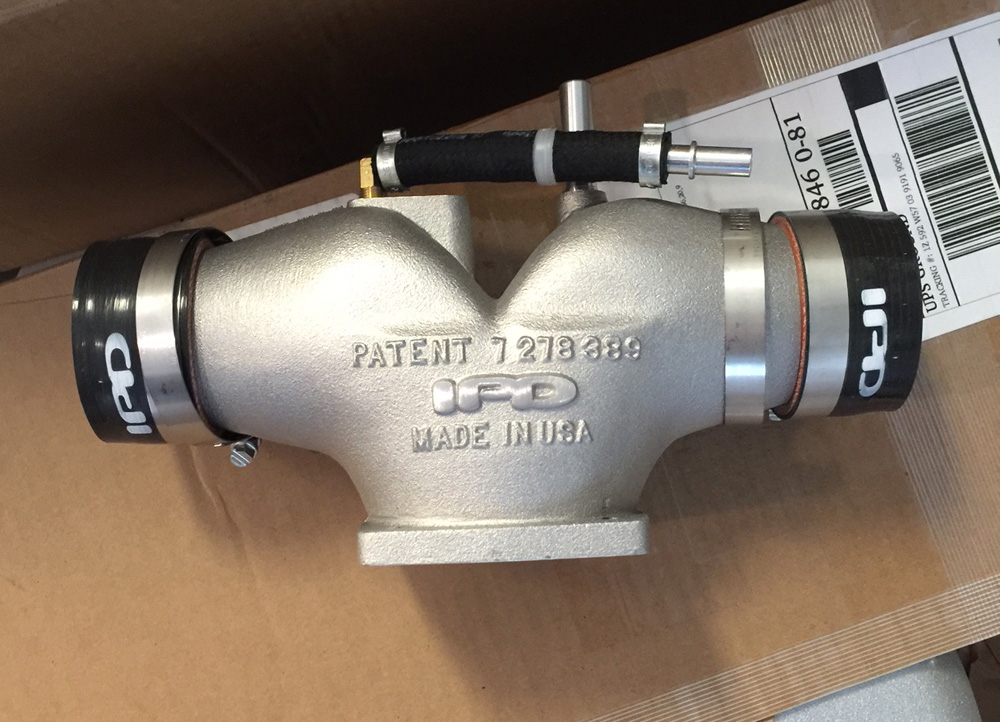
IPD Y-Pipe & Plenum
IPD Plenum close up.
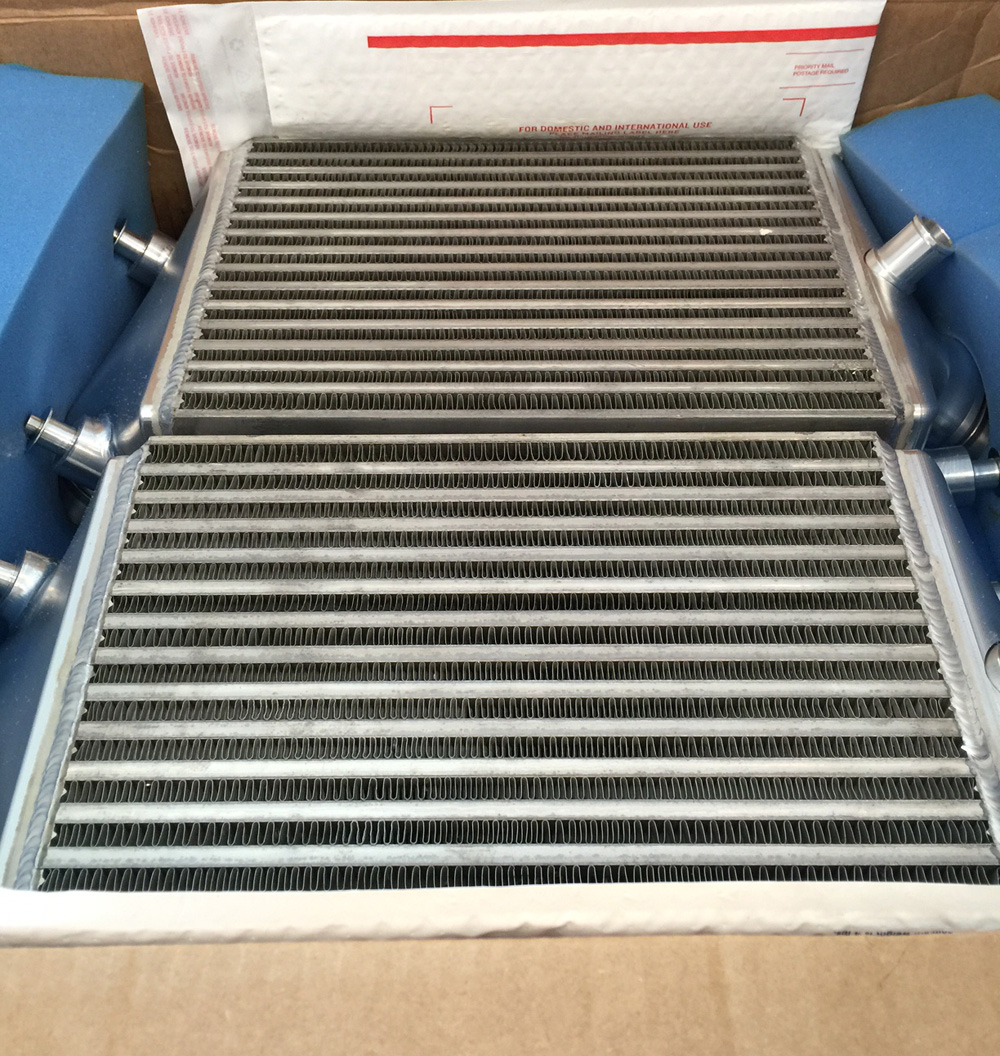
ByDesign billet intercoolers
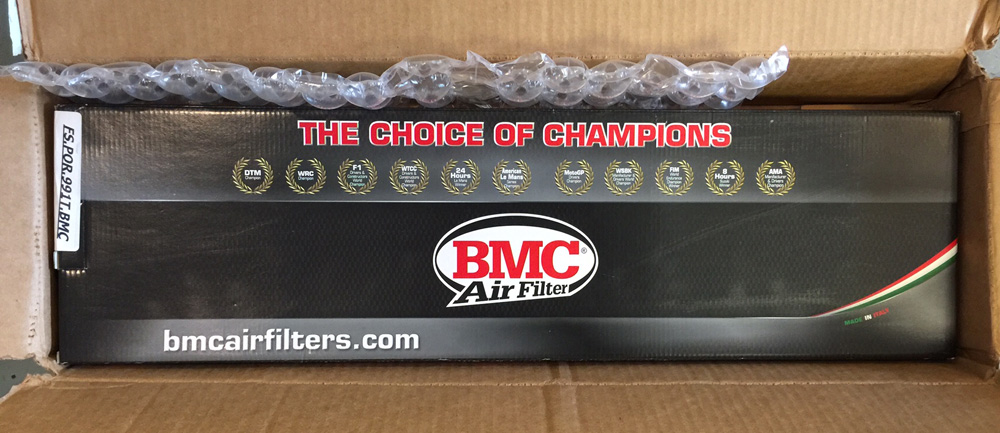
BMC air filter
The installation was done at Ken Garff Lehi. They have a beautiful new facility and all the guys there were super cool and did a fantastic job.
June 25th: Officially underway. The car has been pulled apart. Parts will be added soon…
June 25th: Ken Garff’s service department is new (gorgeous) well organized and they do solid work.
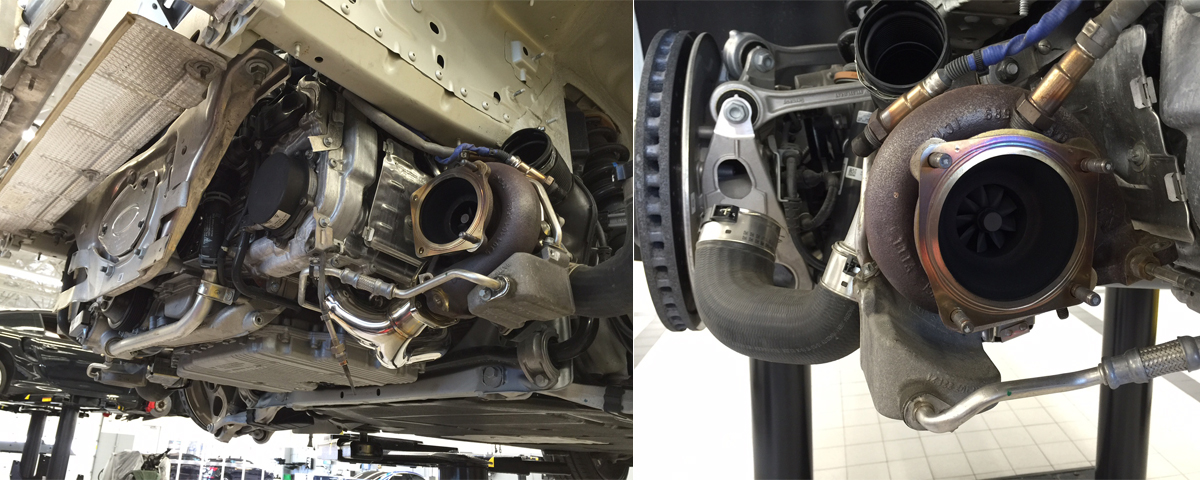
June 25th: Love the way this car looks under the hood (or rather under the bumper).
Headers are in! Daniel (one of the salesman) was holding the headers prior to install and said, “Look at these- like art!” I don’t know about that, but they’re pretty sexy. The catalytic converters are in too! Everything seems like it’s fitting well.
June 27th: Love the way the Fabspeed X-pipe exhaust looks. This should be wicked. So far really happy with the guys at the dealership.
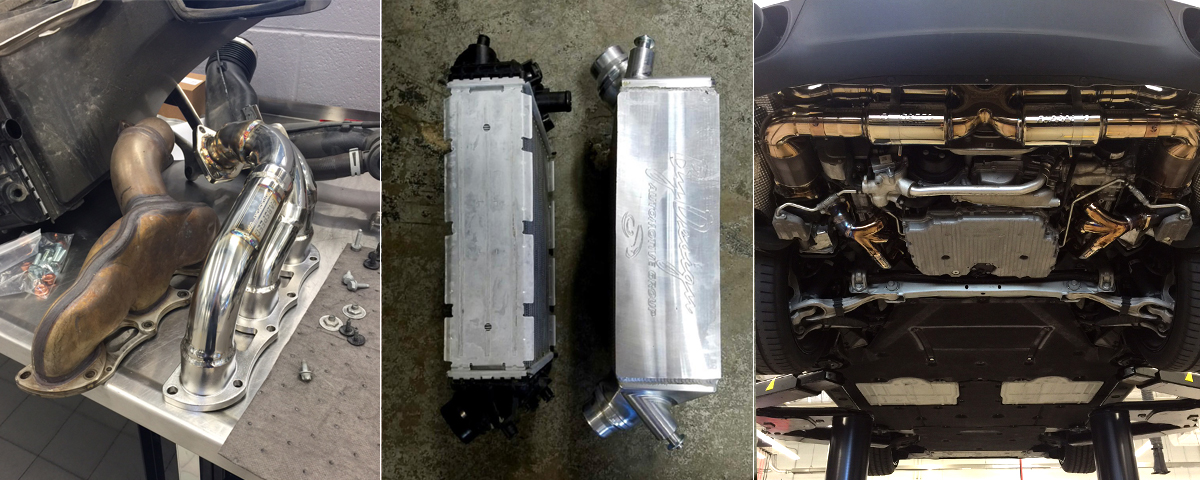
A quick comparison picture of the stock vs Fabspeed headers. Also the stock vs By Design Intercoolers. And then everything zipped back up. It is an absolute shame that you don’t get to see any of the cool stuff locked away in the bumper but at least you get a peek underneath. Visually I really prefer the Fabspeed exhaust to the stock box hanging down off the back of the car.
So ends the installation portion of my journey. Next up- tuning!
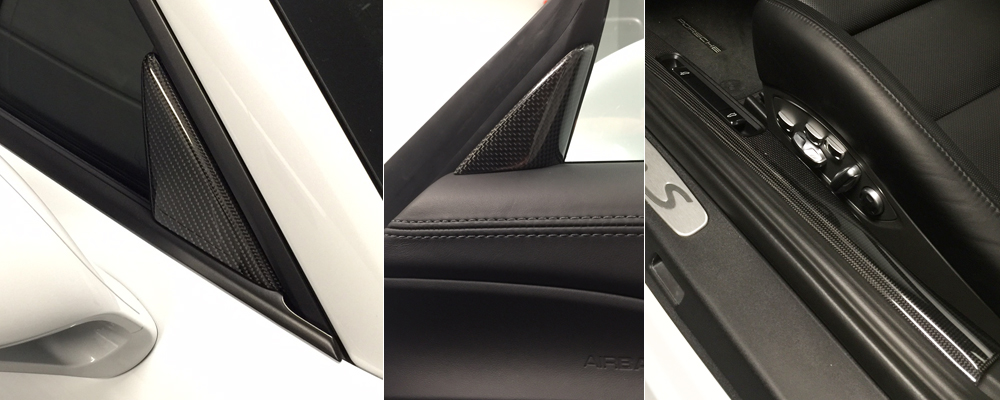
If a little carbon fiber is good then a lot of carbon fiber must be better, right? Realistically I think it is easy to go overboard with this kind of stuff but I’m trying not to. I got a few parts from MACarbon and I think that’s going to be it for awhile.
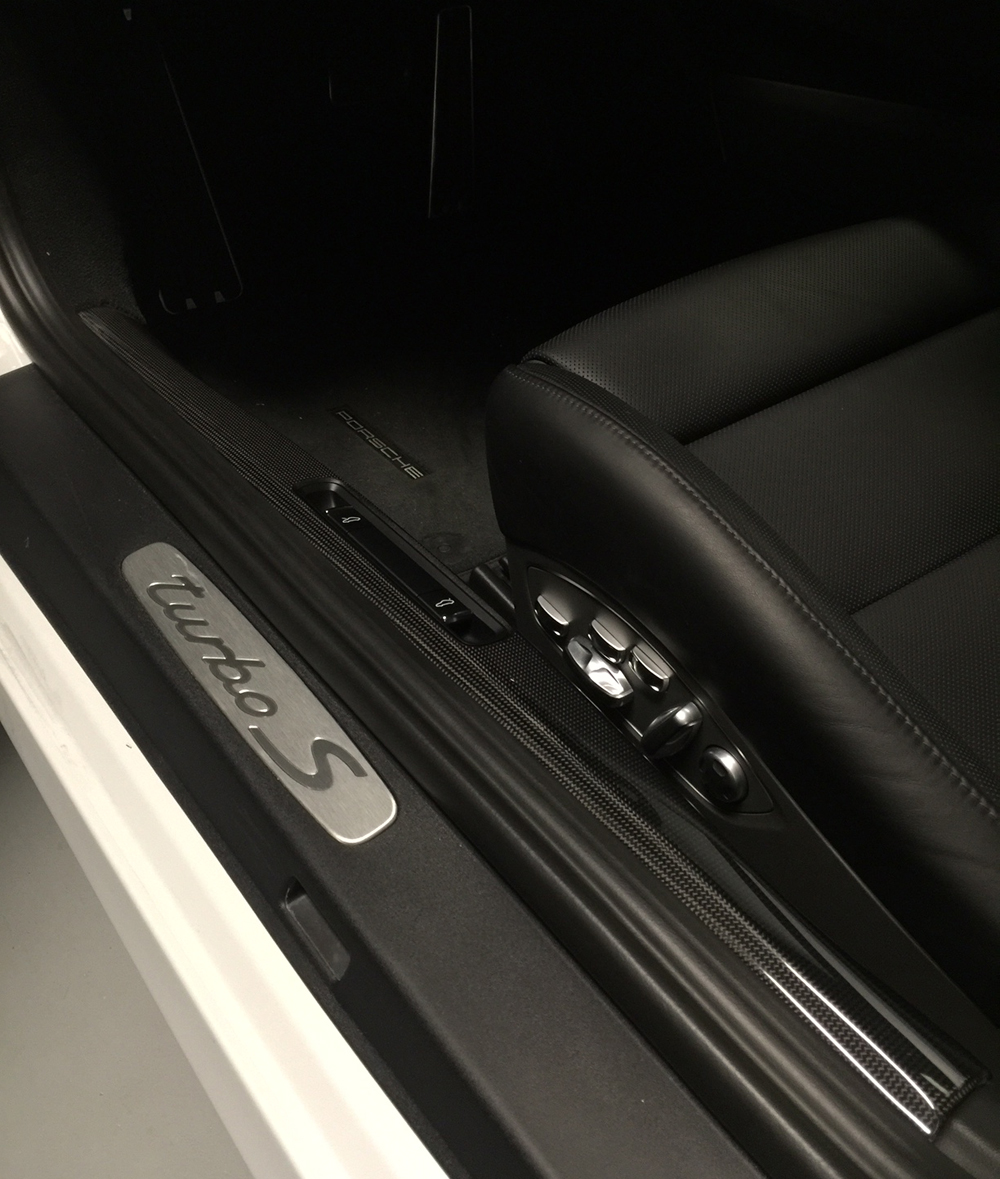
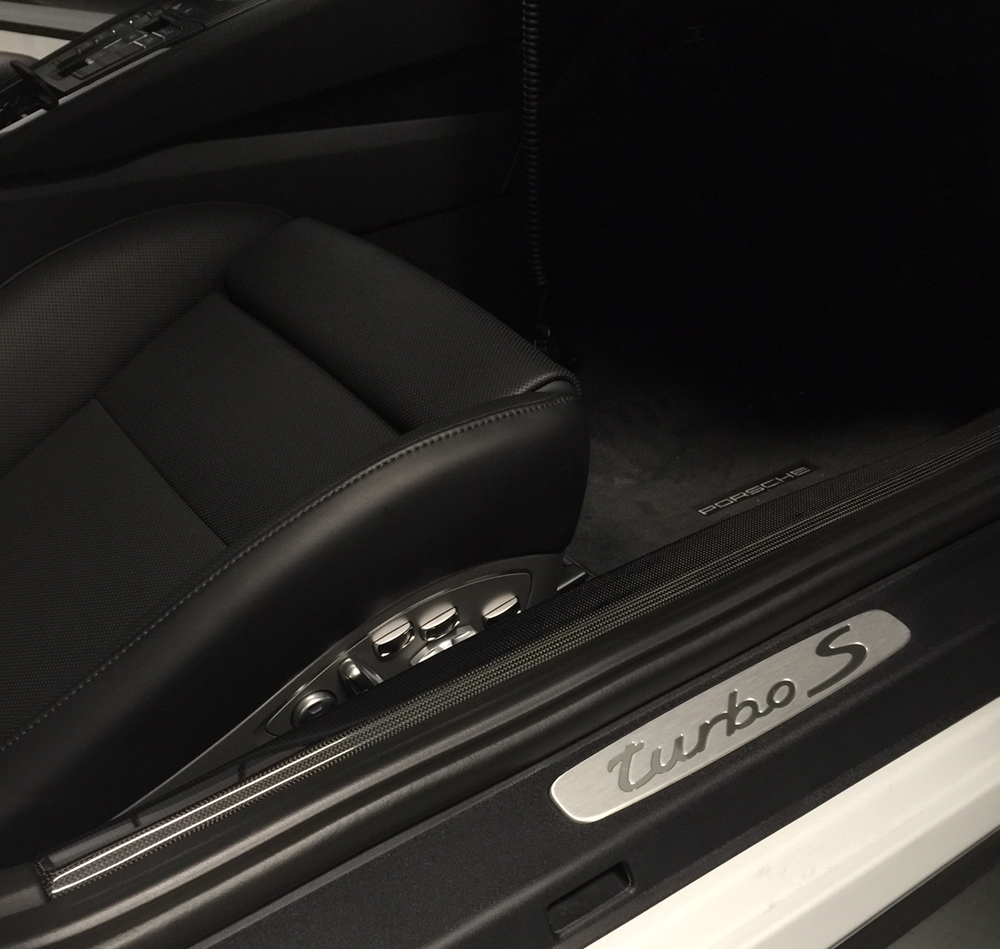
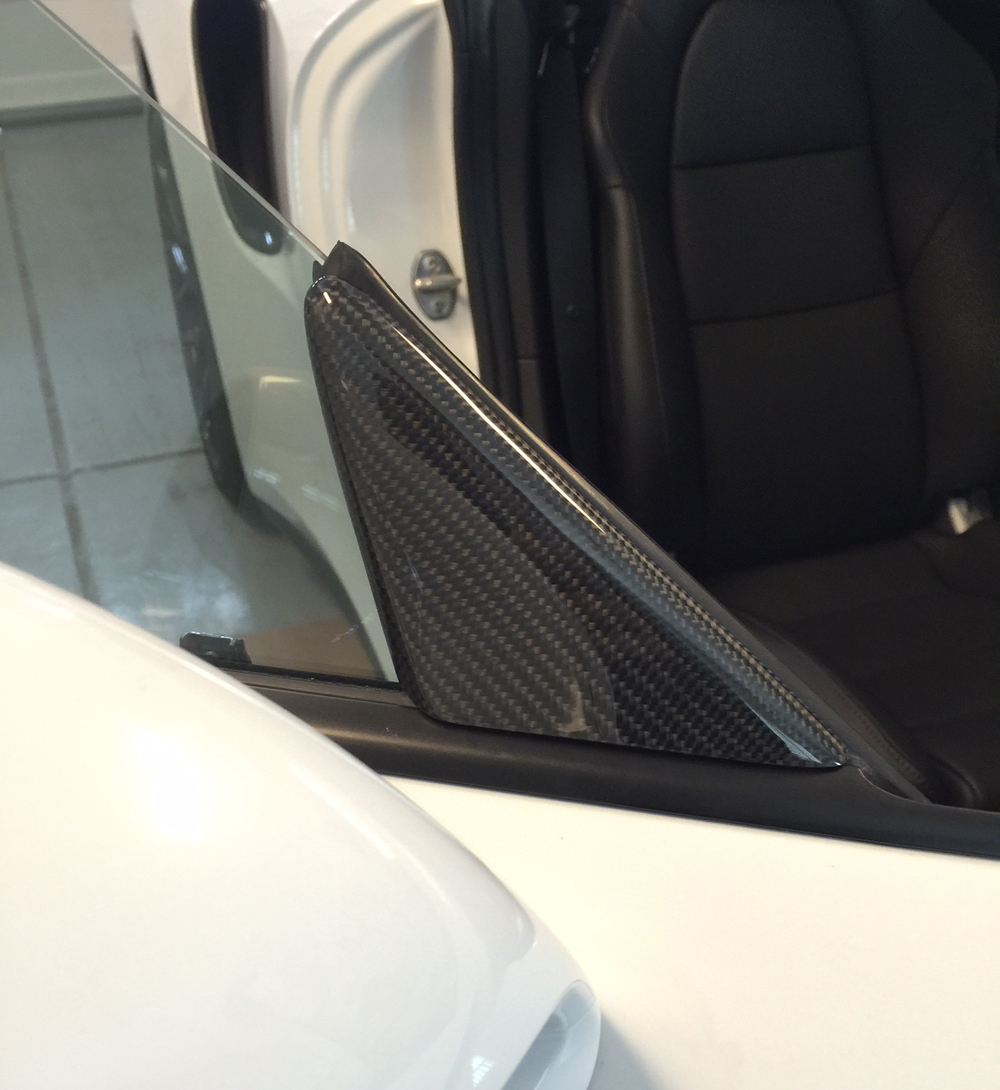
I had considered carbon fiber mirrors but I opted for the triangle trim pieces next to them instead. I also did the small triangle trim on the interior corners of the front windows. Lastly I replaced the plastic interior sill plates with carbon fiber versions. One regret that I had was not getting the carbon fiber door sill plates. But I think replacing the interior sills is a solid compromise and you can still see them with the doors closed (when you’re inside the car).
Doing these projects always gives me some anxiety because things always takes longer than I think they will (should) and something always goes comically wrong. This time around a mounting clip fell into an impossibly small hole and I spent about an hour fishing it out with a magnet. Other than that everything went as well as I could have hoped and I think the finished result was absolutely worth the effort.
Well gee golly, Cam… sure are blogging a lot about your car these days, aren’t you? Yes. I am. But great news: I have a whole post about why I blog about my car. Have a look- it’s insightful. Moving even. And if you’ve taken then time to read that post then when I say “there’s a lot going on right now” everything will make sense.
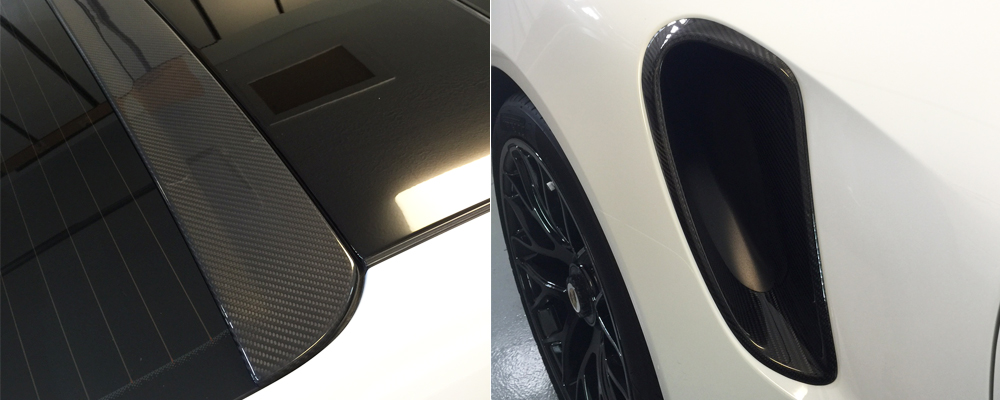
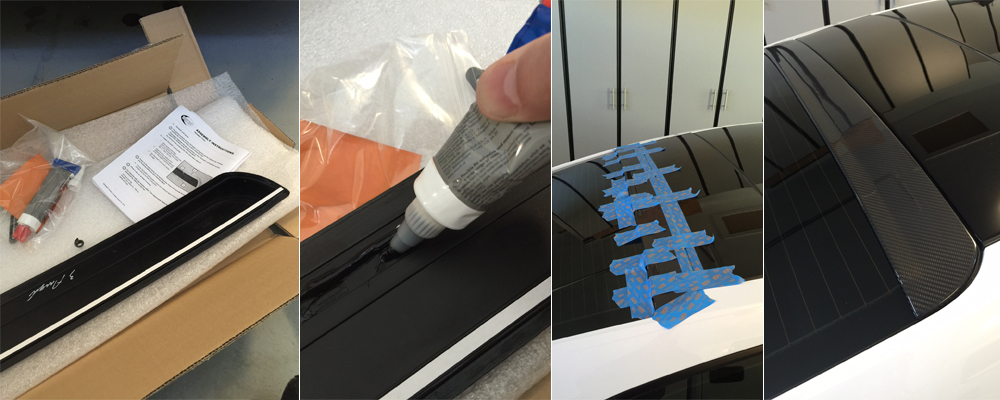
I decided to add a couple of carbon fiber TechArt parts to my car: a rear window spoiler and side air intakes. Just cosmetic modifications- nothing that will void the warranty just yet. I loved all the carbon fiber pieces on the Z07 and I plan to add quite a few more to the 991.
My last 911 (997) had a similar Techart window spoiler and I always thought it looked great. It’s a quick easy way to add some CF bling to a 991.
Installation of the spoiler is pretty straight forward. Clean & degrease the back of the spoiler & window area where the spoiler will go. Per the instructions apply the adhesive(s) and position the spoiler (two people here makes it much easier). You can move the spoiler around even after it’s been placed so no need to worry if it’s not perfect yet. Once you’ve got everything aligned, clean off any extra adhesive, use some painter’s tape to secure everything and let it dry for 24 hours. Remove the tape and Presto!
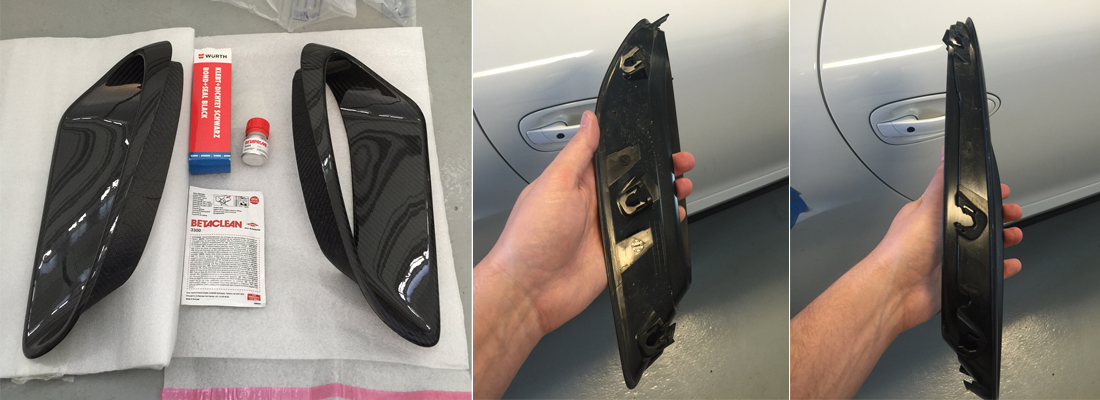
My old 911 also had carbon fiber air intakes (made by ROTtec) which I enjoyed. Since TechArt offered a set I decide to try them out. The Techart intakes are more aggressively styled than the OEM part and similar parts by other competitors. The design is larger and the shape has been slightly altered. Having had the pieces installed for a few days now it’s clear Techart knows how to make quality and complimentary products.
Installing the inlet ducts is more of a challenge. First you have to remove the originals. Good luck. I couldn’t find a helpful online tutorial anywhere. In the end I used my trim tools and poked, prodded and pulled until I got the stupid things out (having to do it twice is the worst part). Honestly, I feel lucky I didn’t break any of the clips. I wish I had something really useful to pass on (maybe “don’t pull the ducts toward you- that’s not how the clips unhook”). At least you can see where the clips are all located on the pieces below. The Techart intakes don’t come with an option for a core swap so this makes them a more expensive relative to other lines and leave little recourse if you’e not truly committed. But I say “Go for it!”
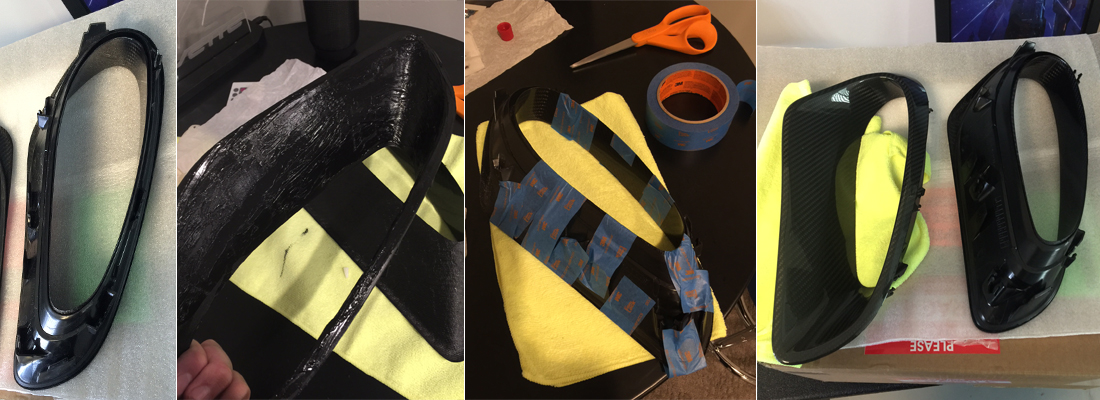
Once the OEM ducts are out you need to prep the parts with the Betaclean wipes. Then apply the Betaprime primer everywhere the parts will have contact. Then apply the adhesive over the primer. Place the carbon fiber inlet trim over the original part. Lining them up properly is very important- you need to make sure the bottom edges are the ones that align (there will actually be a gap at the top- see pic, below, far left). Clean any adhesive off the visible carbon fiber. Tape everything together and let the parts dry for 24 hours. Remove the tape and reinsert the inlet ducts back info the car (this can be tricky- push hard).
I bought these two parts from World Motrosports. They said the items were in stock but when there was no shipping notification after a few days I contacted them and it turned out there was an stock issue on Techart’s end. To their credit they were eventually able to have the items overnighted (for free) from the manufacturer. The turbo inlets didn’t have instructions and although World Motorsports repeatedly promised they would get me the info they forgot. My contact there, Craig, is a super nice guy, but maybe he’s just got too much going on. Despite the issues I’d probably order from them again. There are a couple more carbon fiber parts I’d like to get my hands on…